

Publish to Android
Play Store with a local build or Codemagic in the cloud.
Implementation
Requirements
- Google Play Developer account (USD $25, one-time)
- App created in Google Play Console
- Signing keystore configured (next step)
1. Generate and configure the keystore
You need it on both paths, local build or Codemagic:
keytool -genkey -v -keystore ~/upload-keystore.jks \
  -keyalg RSA -keysize 2048 -validity 10000 \
  -alias upload
After running it, the terminal asks a series of questions. None of them are validated by Google: answer with anything (or leave blank by pressing Enter):
| Question | What to answer |
|---|---|
| Keystore password | You need to remember this one, you'll use it again in key.properties below. Minimum 6 characters. |
| First/last name, organizational unit, company, city, state | Anything (your name, company name). Doesn't affect the app. |
| Country code (2 letters) | Use a real 2-letter code (e.g., US, BR), but even if it's wrong, nothing breaks. |
| "Is this correct?" | Type yes (or y) |
| Key password for "upload" | Press Enter to reuse the same keystore password, easier to remember. |
The password you type here doesn't show on screen while typing (normal terminal behavior) and can't be recovered afterward: if you forget it, you'll need to generate a new keystore (and permanently lose the ability to update any app already published with the old one). Save it in a password manager as soon as you're done.
Create android/key.properties:
storePassword=YOUR_PASSWORD
keyPassword=YOUR_PASSWORD
keyAlias=upload
storeFile=/path/to/upload-keystore.jks
Never commit key.properties or the .jks file. Add both to .gitignore.
And configure it in android/app/build.gradle:
def keystoreProperties = new Properties()
def keystorePropertiesFile = rootProject.file('key.properties')
if (keystorePropertiesFile.exists()) {
  keystoreProperties.load(new FileInputStream(keystorePropertiesFile))
}

android {
  signingConfigs {
    release {
      keyAlias keystoreProperties['keyAlias']
      keyPassword keystoreProperties['keyPassword']
      storeFile file(keystoreProperties['storeFile'])
      storePassword keystoreProperties['storePassword']
    }
  }
  buildTypes {
    release {
      signingConfig signingConfigs.release
    }
  }
}
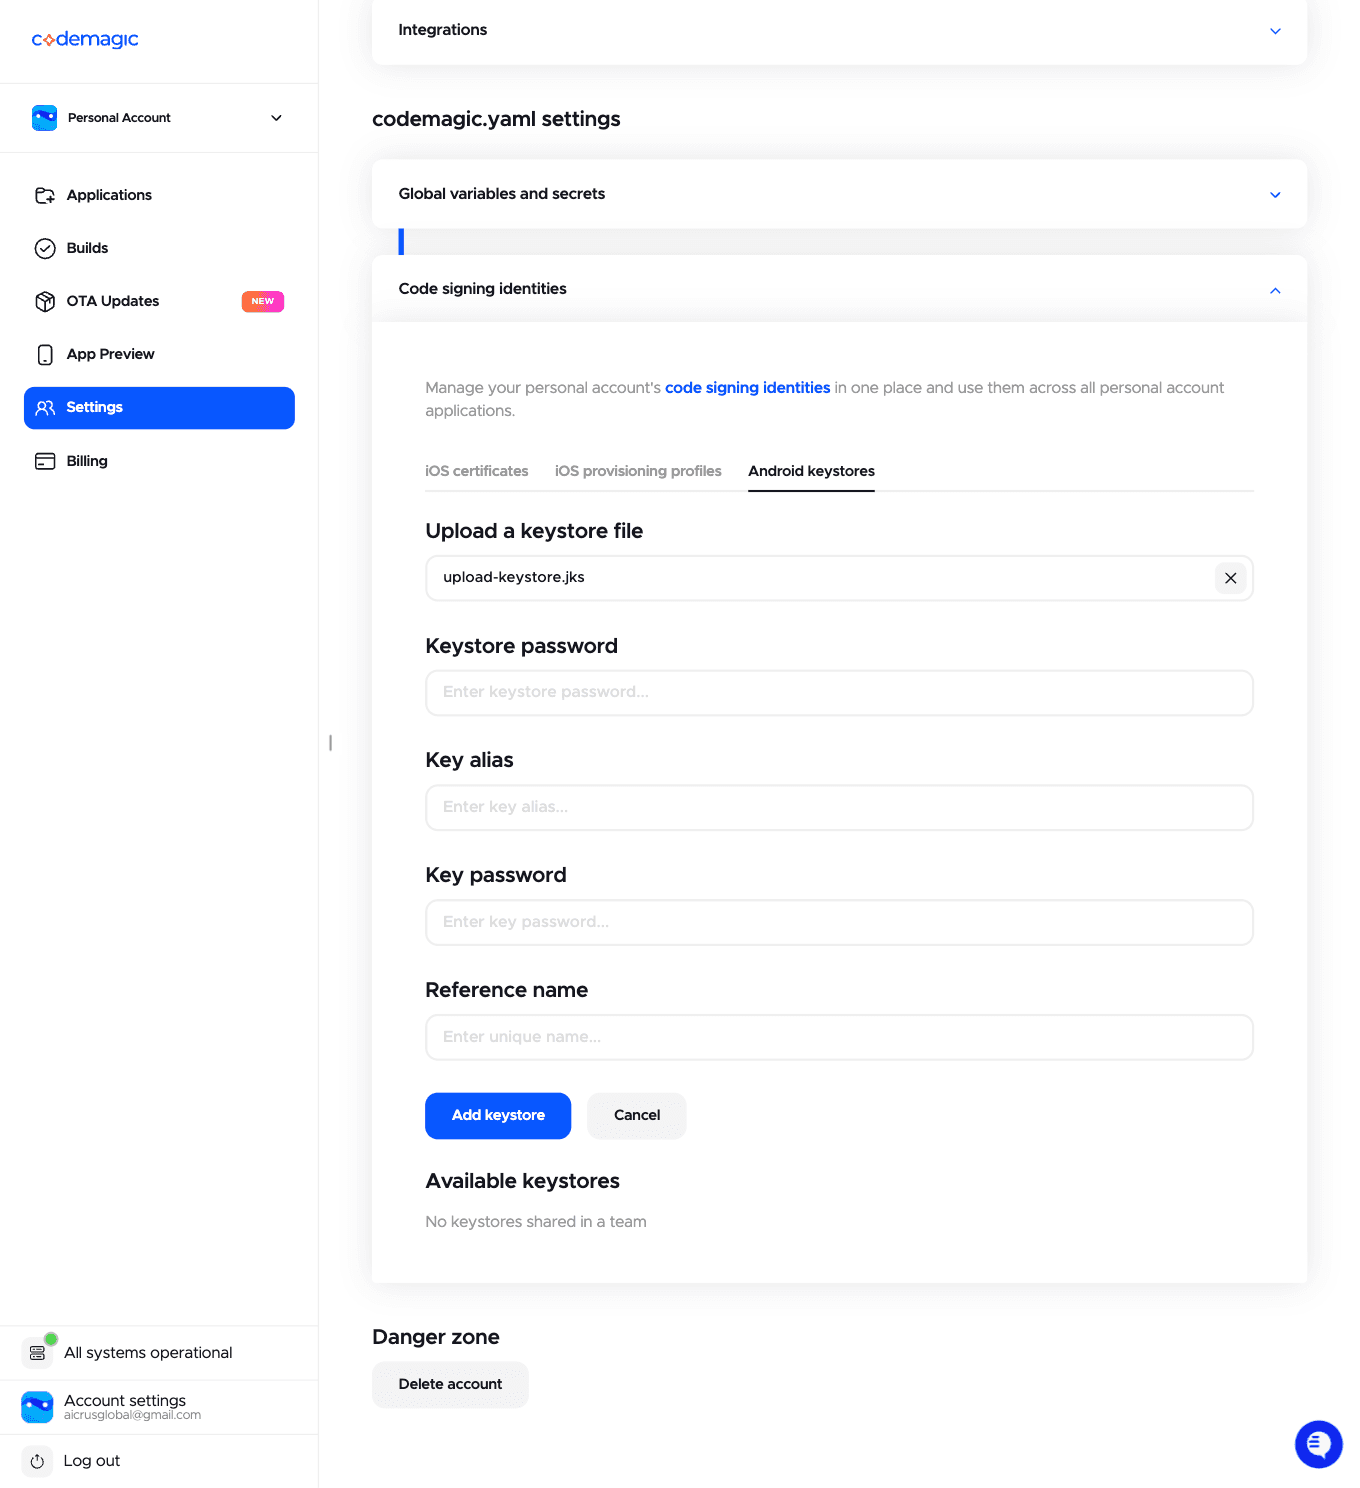
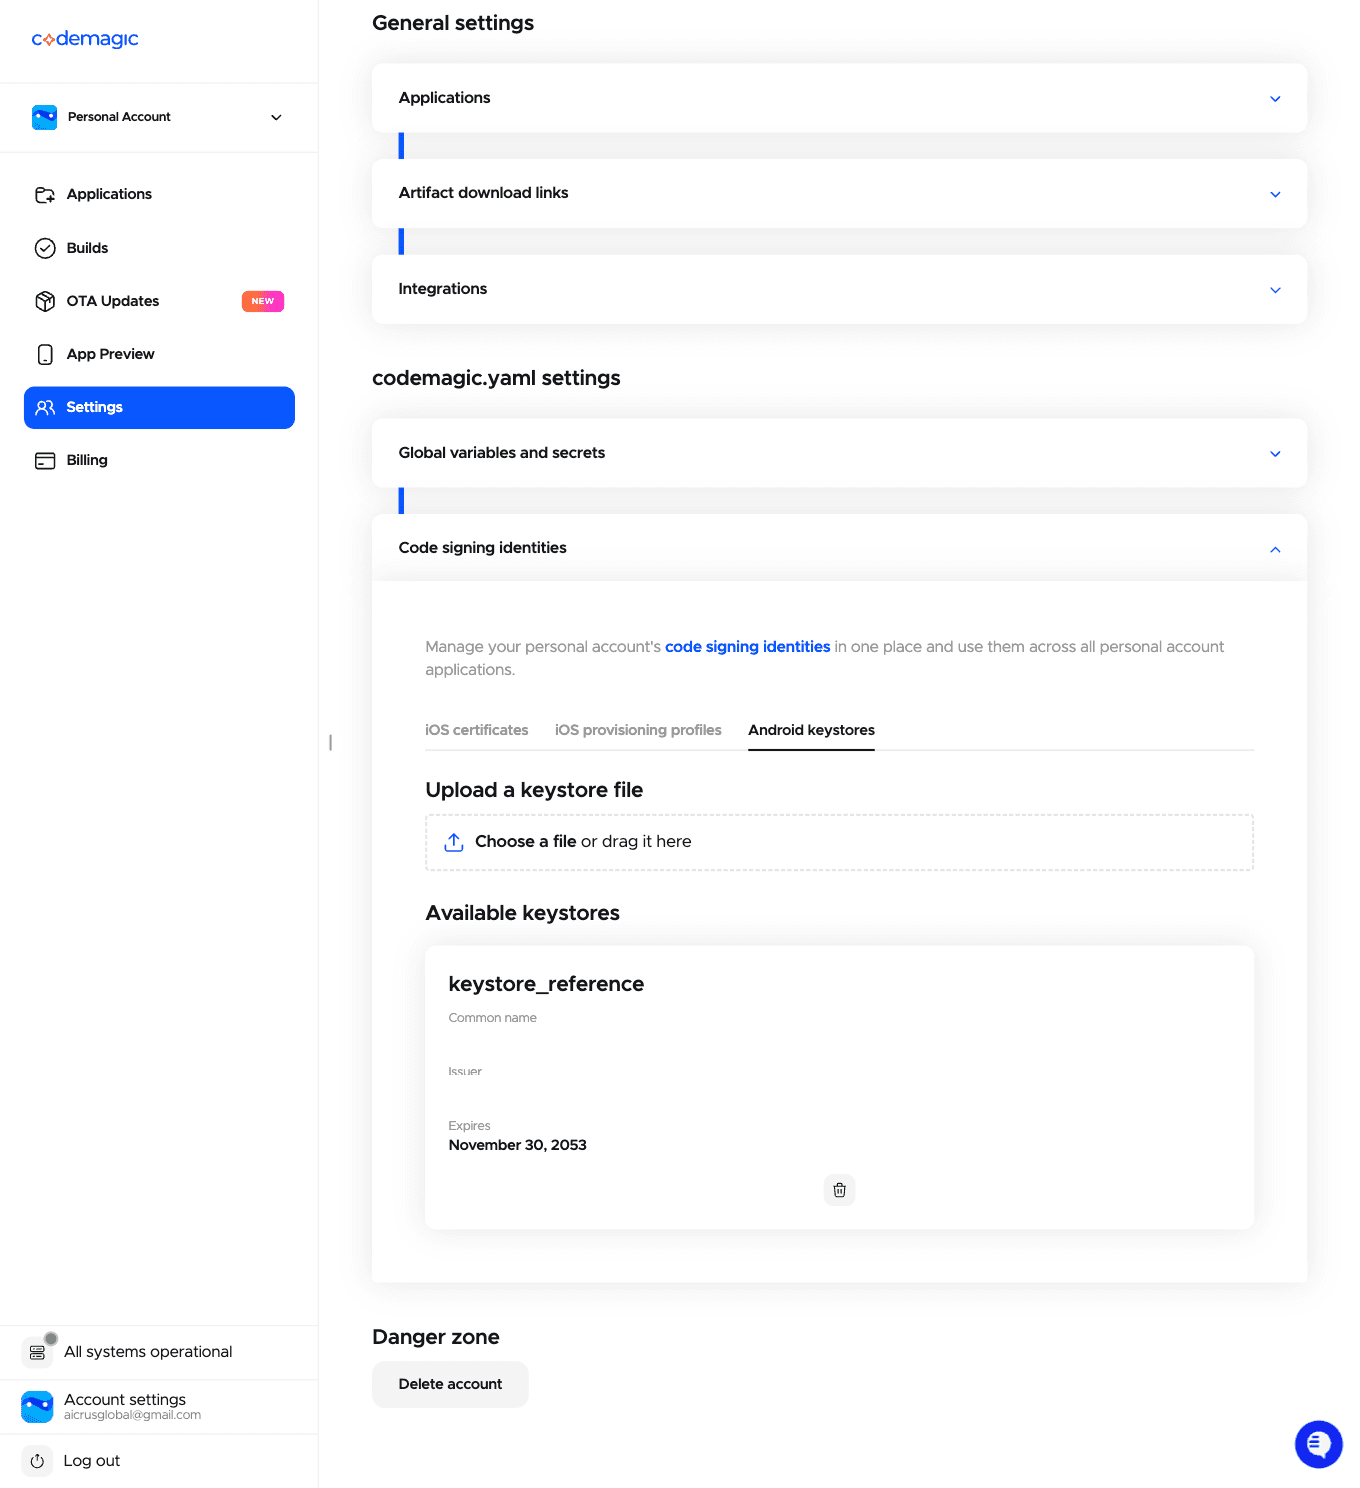
If you're going to publish through Codemagic, you don't need this gradle step: you just upload the same .jks file in the dashboard (Code signing identities → Android keystores) and Codemagic signs it for you.
Via MCP: keytool -genkey (generating the .jks) you run once, outside the MCP. But once you have the file, ask your assistant "set up Android signing with this keystore", it runs kasy android configure (configure_android_signing) and writes key.properties for you, no manual copy-pasting of passwords. See Kasy MCP.
2. Local release build (optional, if you won't use Codemagic)
flutter build appbundle --release --dart-define=ENV=prodOr, with the Kasy CLI (signing already configured): kasy android release / kasy android build-aab.
Via MCP: "build the Android AAB" (build_aab or release_android). See Kasy MCP.
Generates the file at build/app/outputs/bundle/release/app-release.aab. Upload this file to Play Console.
Need an APK instead of an AAB (sideloading, alternative stores like Amazon/Samsung/F-Droid, or a quick test on a phone)? The Play Store only takes AAB, but the MCP also has build_apk (debug, unsigned) and build_apk_signed (release, uses the same signing above). See Kasy MCP.
--dart-define=ENV=prod is required in release. Without it the app may use the development config.
3. Or publish with Codemagic (no local setup)
Codemagic builds and ships to Play Store in the cloud.
1. Add CI to the project
Project created with kasy new? codemagic.yaml is already included by default (in both Quick and Step-by-step modes; in Step-by-step, CI/CD comes pre-checked in the multiselect). Only run the command below if you deselected CI/CD when creating the project, or if the project predates this option.
kasy add ciVia MCP: "add CI/CD to the project" (add_feature).
Creates codemagic.yaml with the android-workflow workflow.
2. Set up in the Codemagic dashboard (once)
- codemagic.io/apps → connect your repository
- Settings → Code signing identities → Android keystores: upload the
.jksfile → fill in Keystore password, Key alias, Key password (the same ones you used withkeytool -genkey) and Reference name =keystore_reference
- Upload the Google Play service account JSON as the secret variable
GOOGLE_PLAY_SERVICE_ACCOUNT_CREDENTIALS(groupgoogle_play)
3. Adjust 1 field in codemagic.yaml
Replace the email in publishing.email.recipients with yours (or delete the whole email: section if you don't want notifications).
4. Set up in the terminal (once)
kasy codemagic configureVia MCP: this step has its own tool too, ask "configure Codemagic for this project" and the assistant runs configure_codemagic (sets the token and app ID). Only creating the Codemagic account and uploading the keystore in the dashboard (step 2 above) stay manual. See Kasy MCP.
5. Publish
Via MCP: with the keystore and Codemagic already set up (steps above), ask your assistant "publish Android with Codemagic". It runs codemagic_release and can track status with codemagic_status. See Kasy MCP.
kasy codemagic release --android
kasy codemagic status <buildId>   # follow it
The build goes to the internal track by default (configurable in codemagic.yaml).
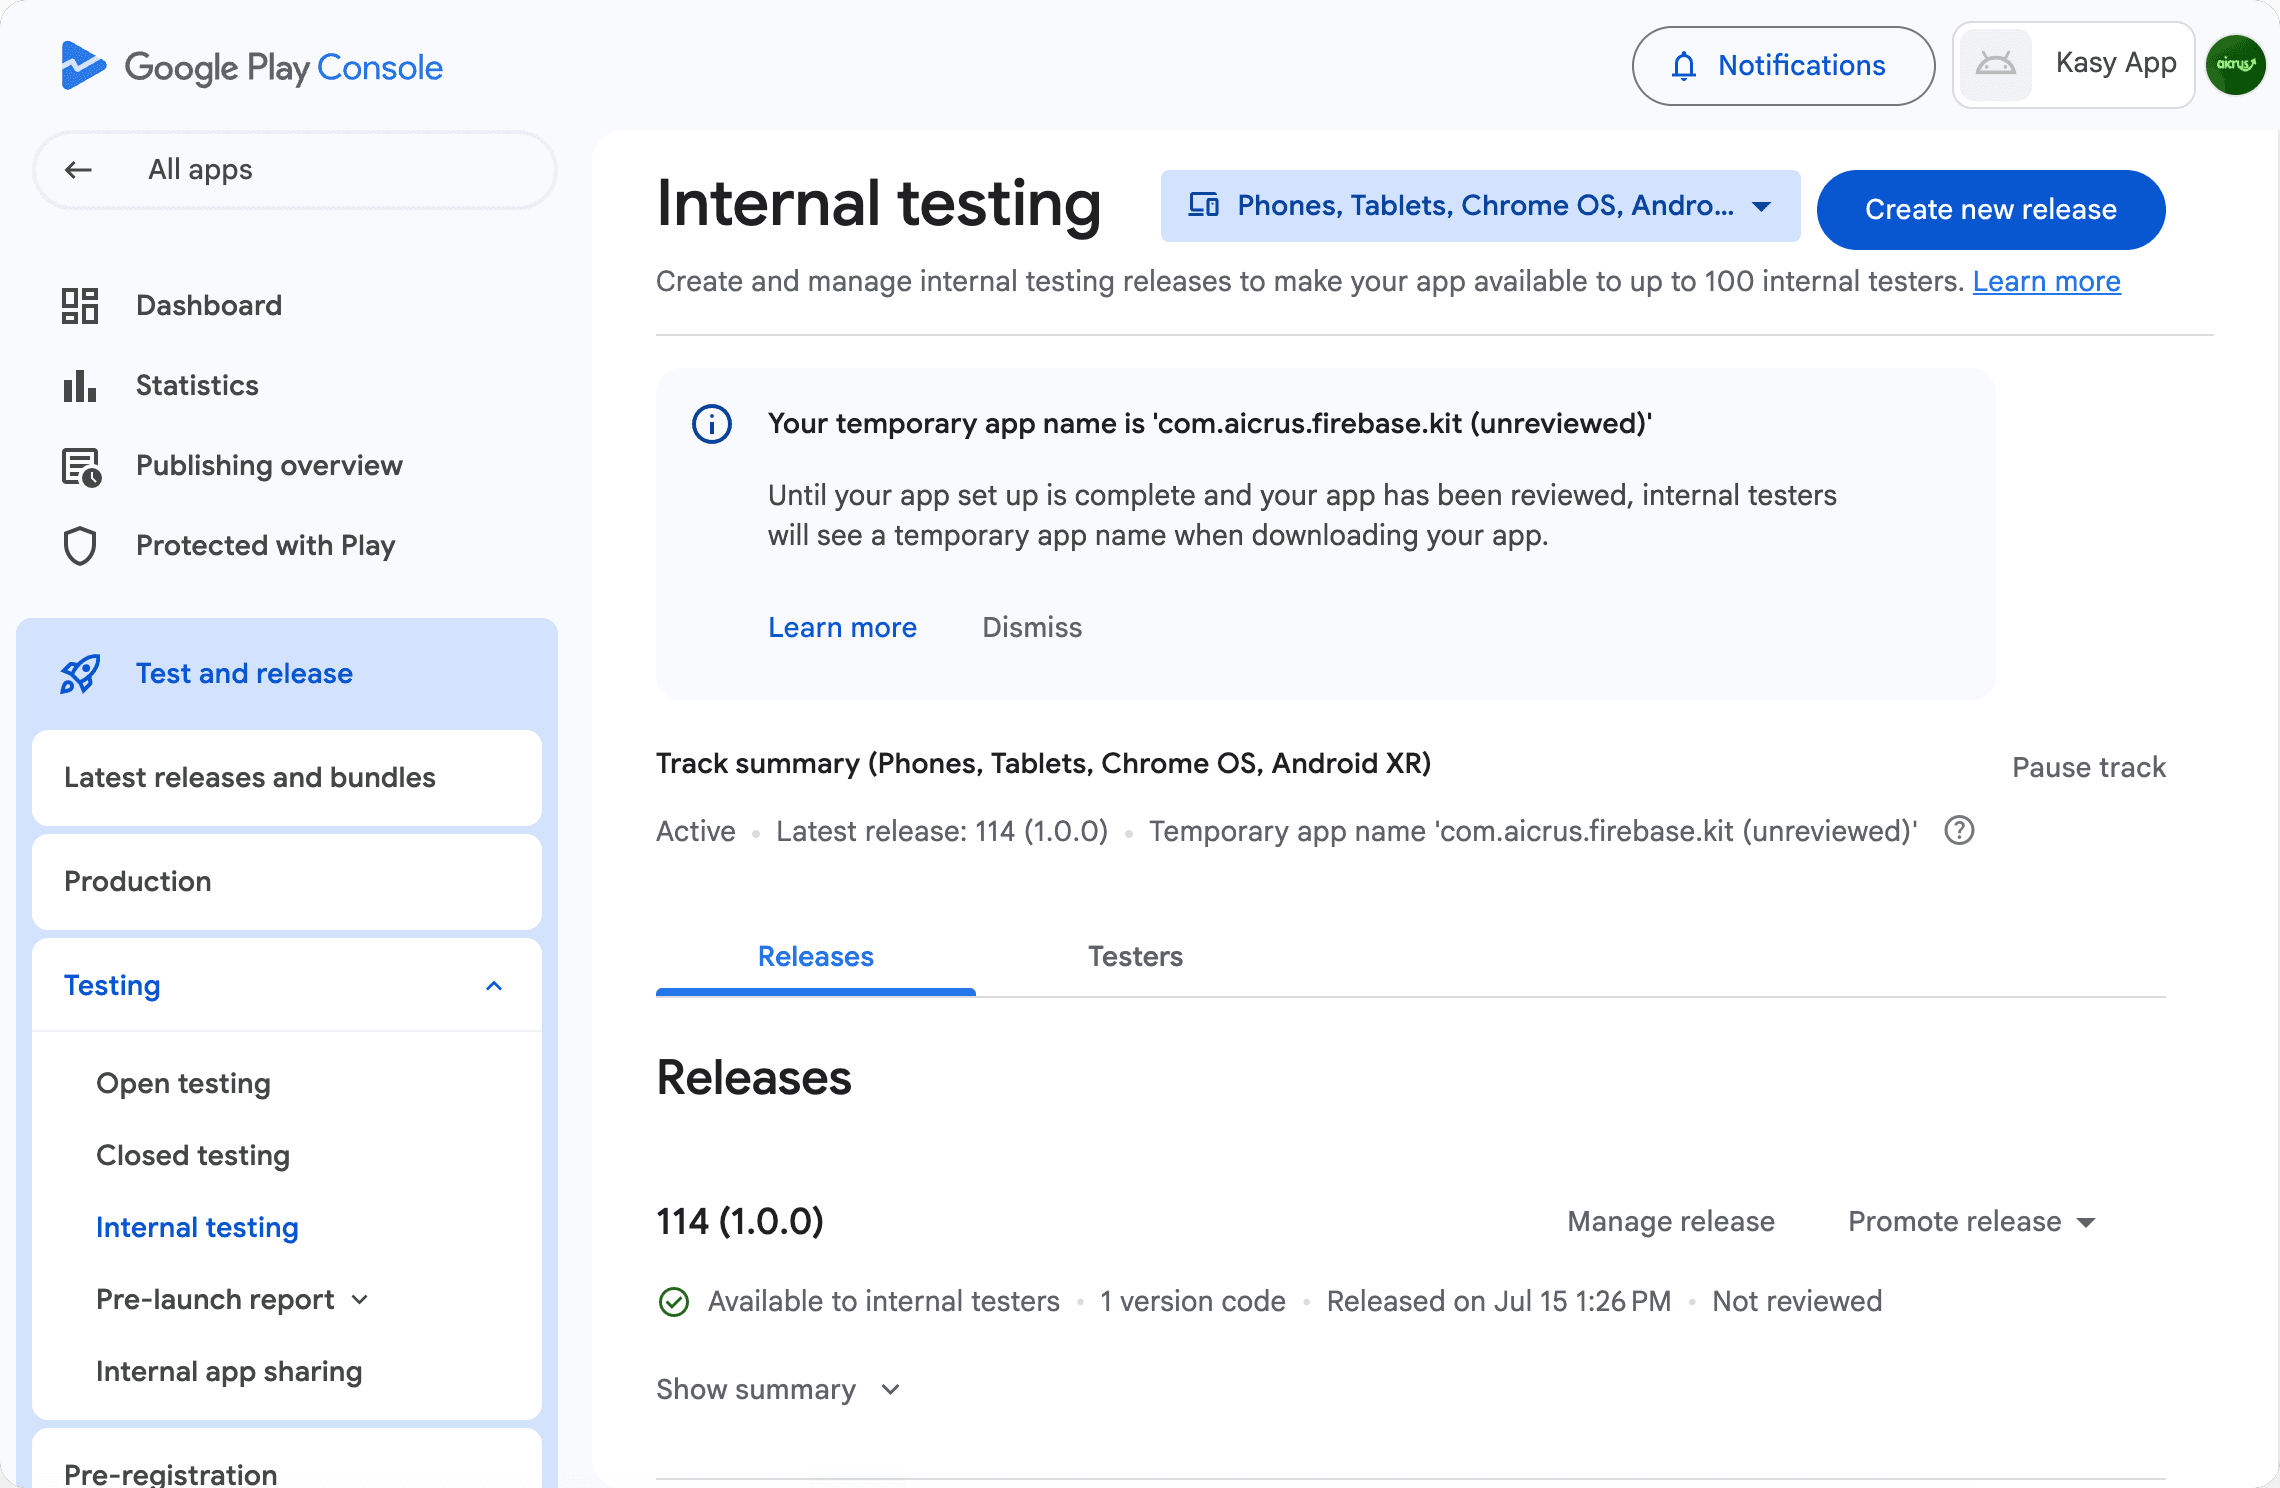
The build uploads as a draft (submit_as_draft: true in codemagic.yaml). There's still one manual step left: Play Console → Internal testing → Review release → Start rollout, to actually release it to testers.
Information
Recommended track
Publish first to the internal track to test with your team, then to closed (beta), and only then to production. Play Store doesn't require manual approval for the internal track.
Version in pubspec.yaml
Keep version: 1.0.0+1 in pubspec.yaml. The number after the + is the build number, it needs to be bumped on every upload. kasy codemagic release does this automatically.
Last updated on 08/23/2026