
RevenueCat (mobile)
iOS and Android subscriptions with RevenueCat. From the Test Store to production.
RevenueCat manages subscriptions and purchases in the app for iOS and Android. It connects the App Store and Play Store to your backend, syncs premium status, and fires webhooks when a purchase happens.
Web uses Stripe. RevenueCat covers iOS and Android. For web payments, see Stripe.
Implementation
Via the Kasy MCP: ask your assistant "add revenuecat to my project" to turn the feature on in the code (add_feature). The RevenueCat MCP (below) is a different thing: it builds the catalog (products, entitlements, offerings) in their dashboard. See Kasy MCP.
Phase 1: Test Store (no Apple or Google account)
RevenueCat has an environment called Test Store that simulates purchases without needing an Apple or Google account. Ideal for validating the full flow before setting up the real stores.
The Test Store validates your integration, not the store. If a purchase works here, it proves the paywall opens, the entitlement activates, the webhook fires and the row lands in the database. None of that says the real sale will work.
Only Phase 2 proves: identical IDs between store and RevenueCat, paid applications agreement signed, bank account validated, product approved and payment account active. Miss any of these and Sandbox returns an empty list even with the right key.
Do not skip Phase 2 assuming Phase 1 already covered it.
1. Create an account and project on RevenueCat
Go to app.revenuecat.com → create a free account → create a project.
2. Get the Test Store key
Every RevenueCat project already ships with a Test Store app ready to go, you don't need to create anything. The key lives under API keys → SDK API keys → Test Store.
Copy the test_xxx key shown.
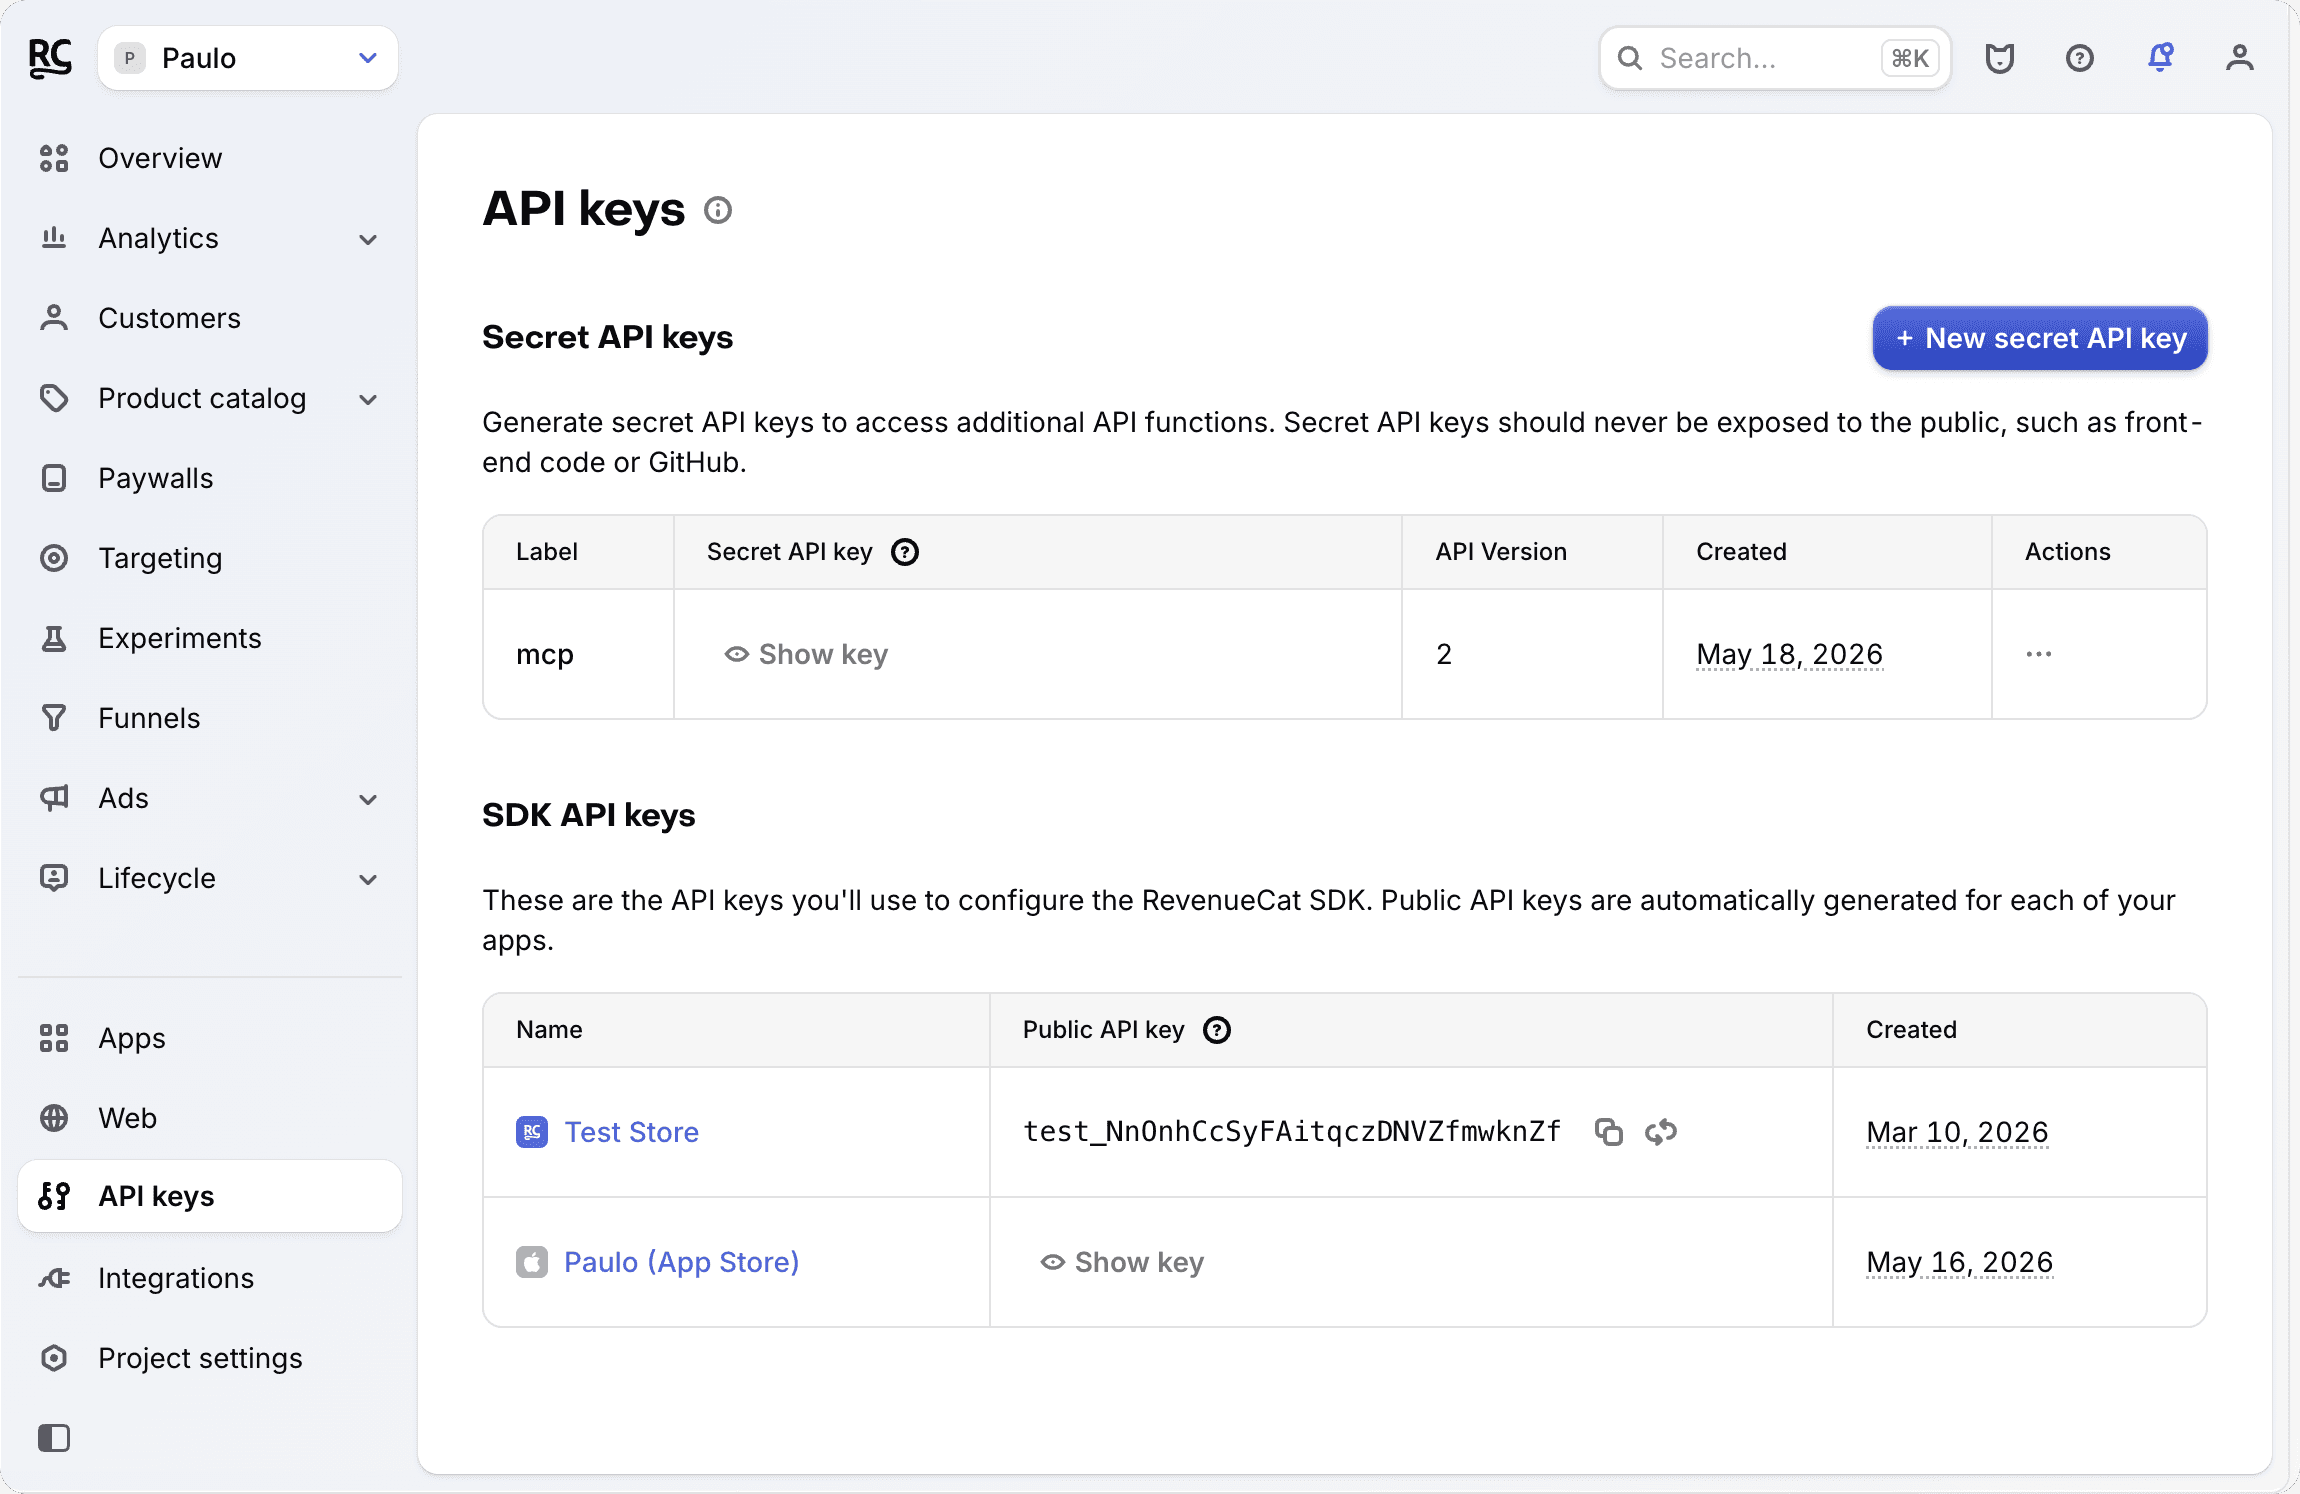
The app type in RC and the key's prefix must match. Test Store → the key starts with test_. If you create it as App Store and use test_, you get an INVALID_CREDENTIALS error.
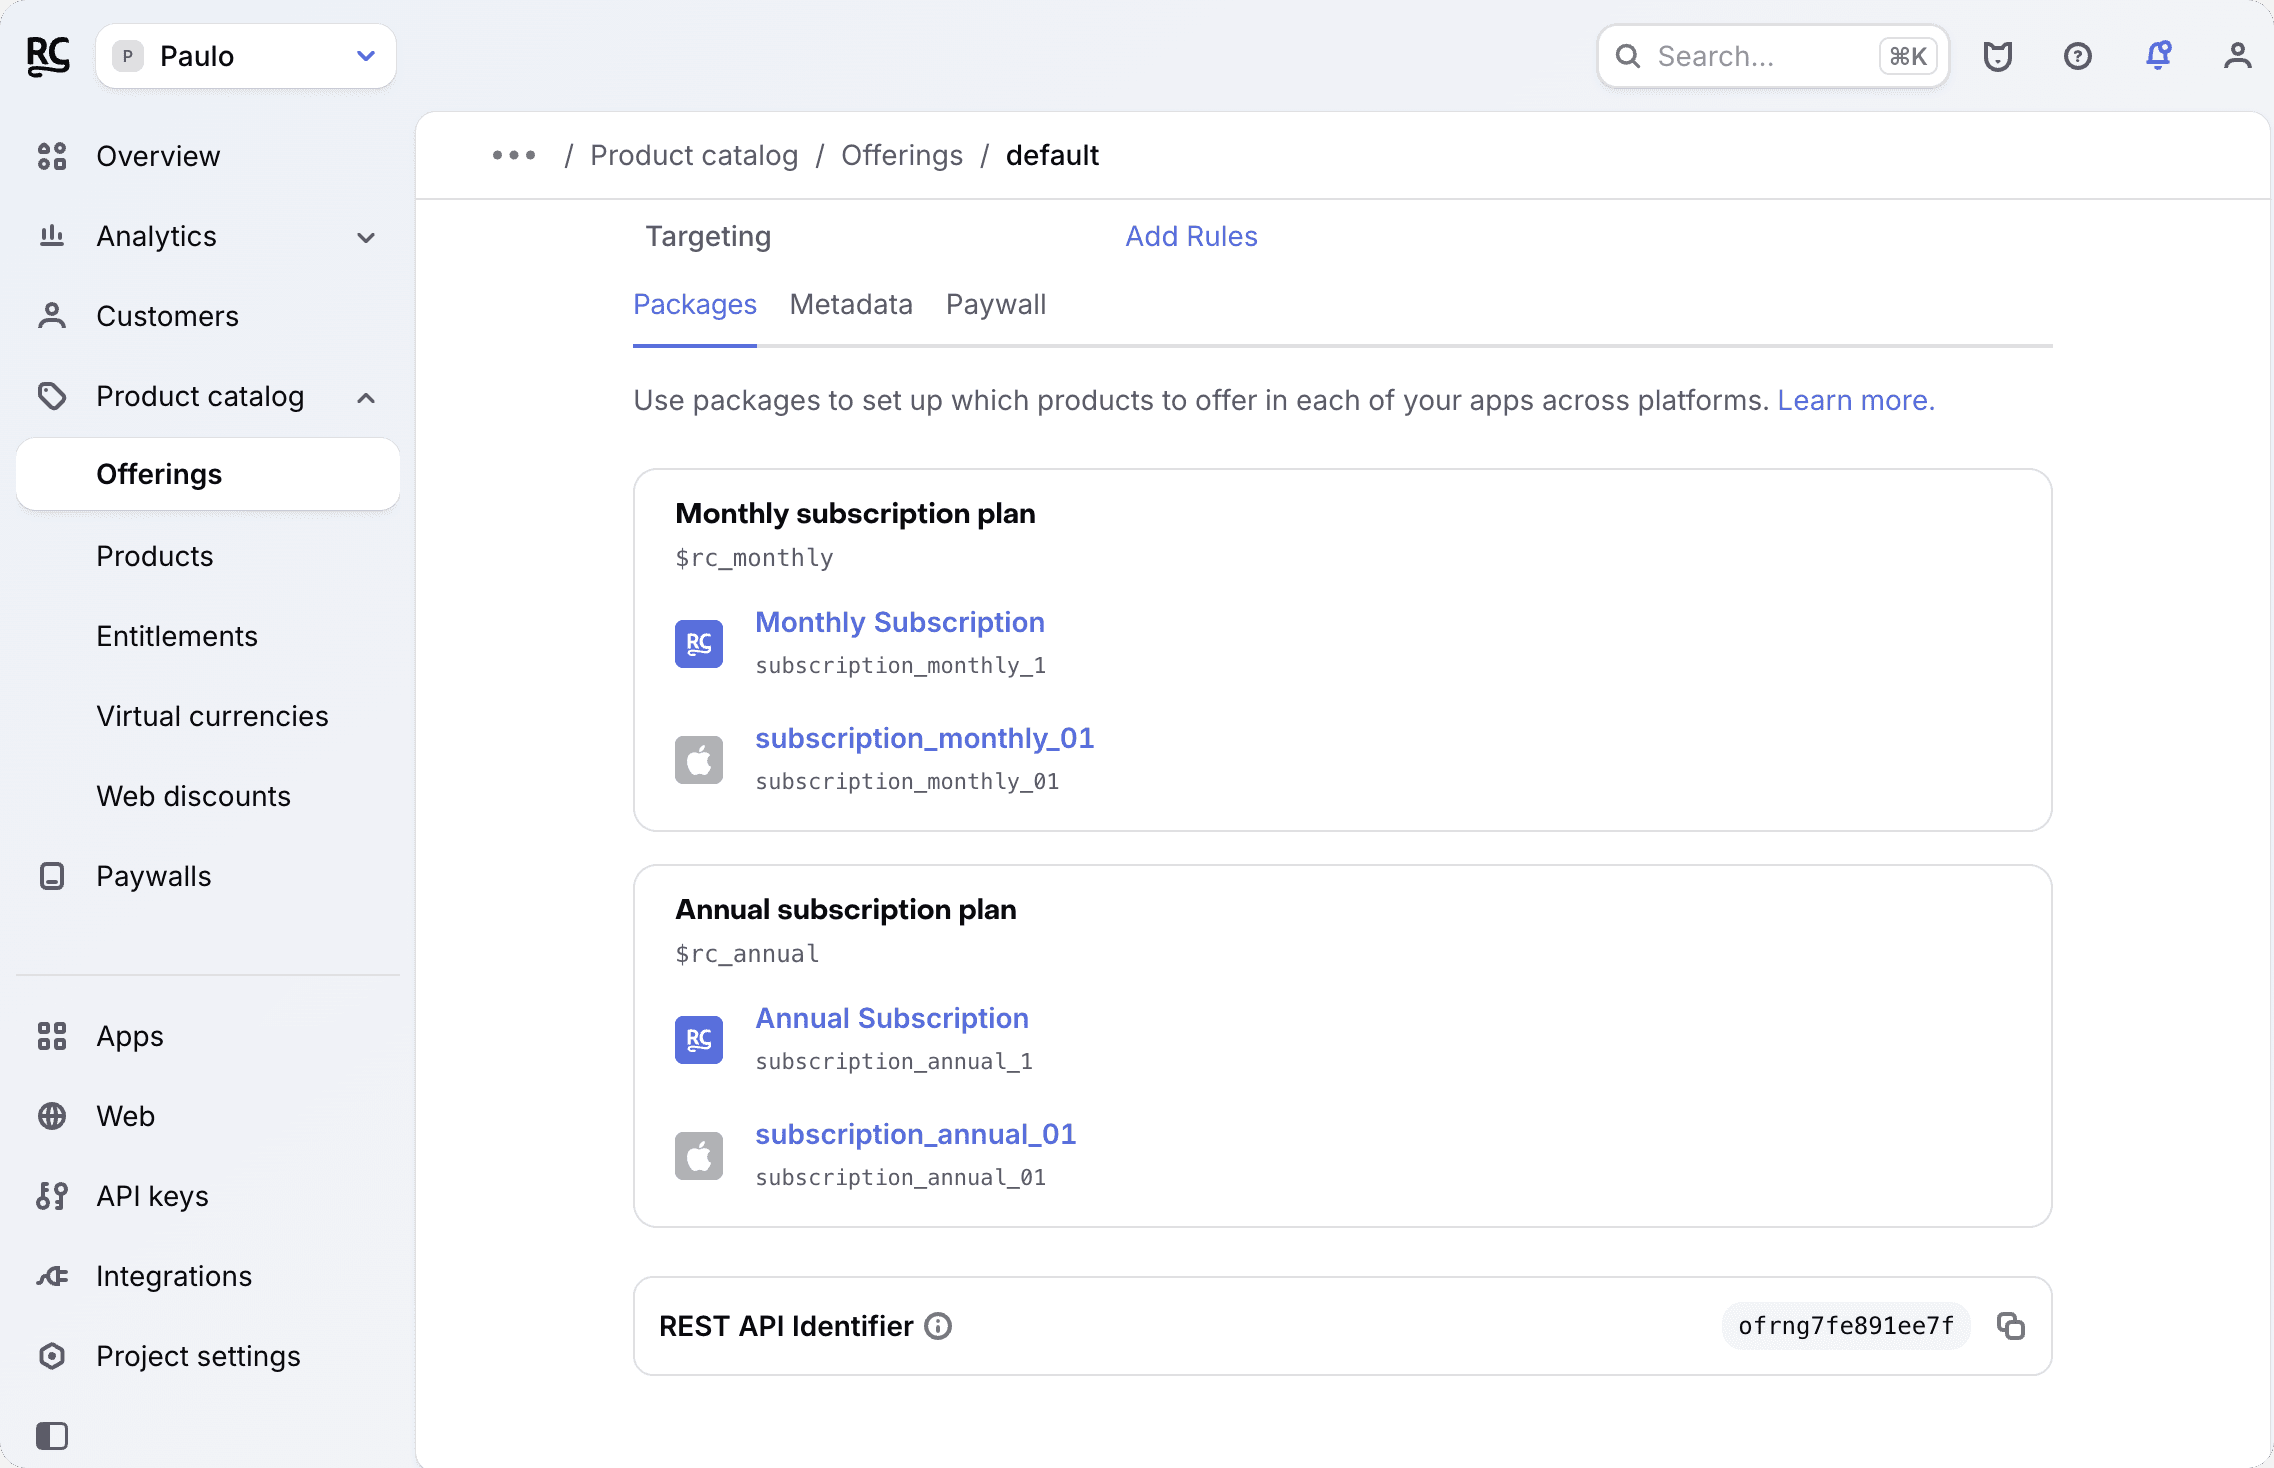
3. Create Products, Entitlements, and Offerings
From the RC dashboard (or via RevenueCat's MCP):
- Products →
+ New→ create the plans (e.g.,premium_monthly,premium_annual) - Entitlements →
+ New→ createpremium_access→ attach the products - Offerings →
+ New→ createdefault→ add the products
4. Configure it in the project
For a new project, the CLI asks for the key during kasy new.
On an existing project:
kasy add revenuecatOr edit the .env directly:
RC_TEST_KEY=test_xxxxxxxxxxxxxxxVia MCP: paste the key in chat and ask "set up the RevenueCat key". The assistant writes it with configure_project_keys, no need to hand-edit .env. See Kasy MCP.
5. Run and test
kasy run # iOS simulator or Android emulatorA simulated purchase modal appears with 3 options: Success / Error / Cancelled. Choose Success: the entitlement should activate and the app should unlock the premium content.
Webhook key
The webhook key (rc_wh_...) must be identical on the backend and in the RevenueCat dashboard (Authorization header value field). The function compares the full header string, including the Bearer prefix.
In Quick mode (kasy new), the RevenueCat module is already installed, but credentials are not: the key prompt only appears in the interactive flow (not Quick). Configure later with kasy configure, MCP configure_project_keys, or kasy deploy.
Backend:
- Store the secret:
kasy configure/configure_project_keyswithRC_WEBHOOK_KEY, orkasy deploy(when the key is already in that flow). On Supabase the secret is namedREVENUECAT_WEBHOOK_KEY; the CLI stores it with theBearerprefix. - RevenueCat → Project → Integrations → Webhooks → "Authorization header value": paste
Bearer+ the same key (e.g.Bearer rc_wh_abc123).
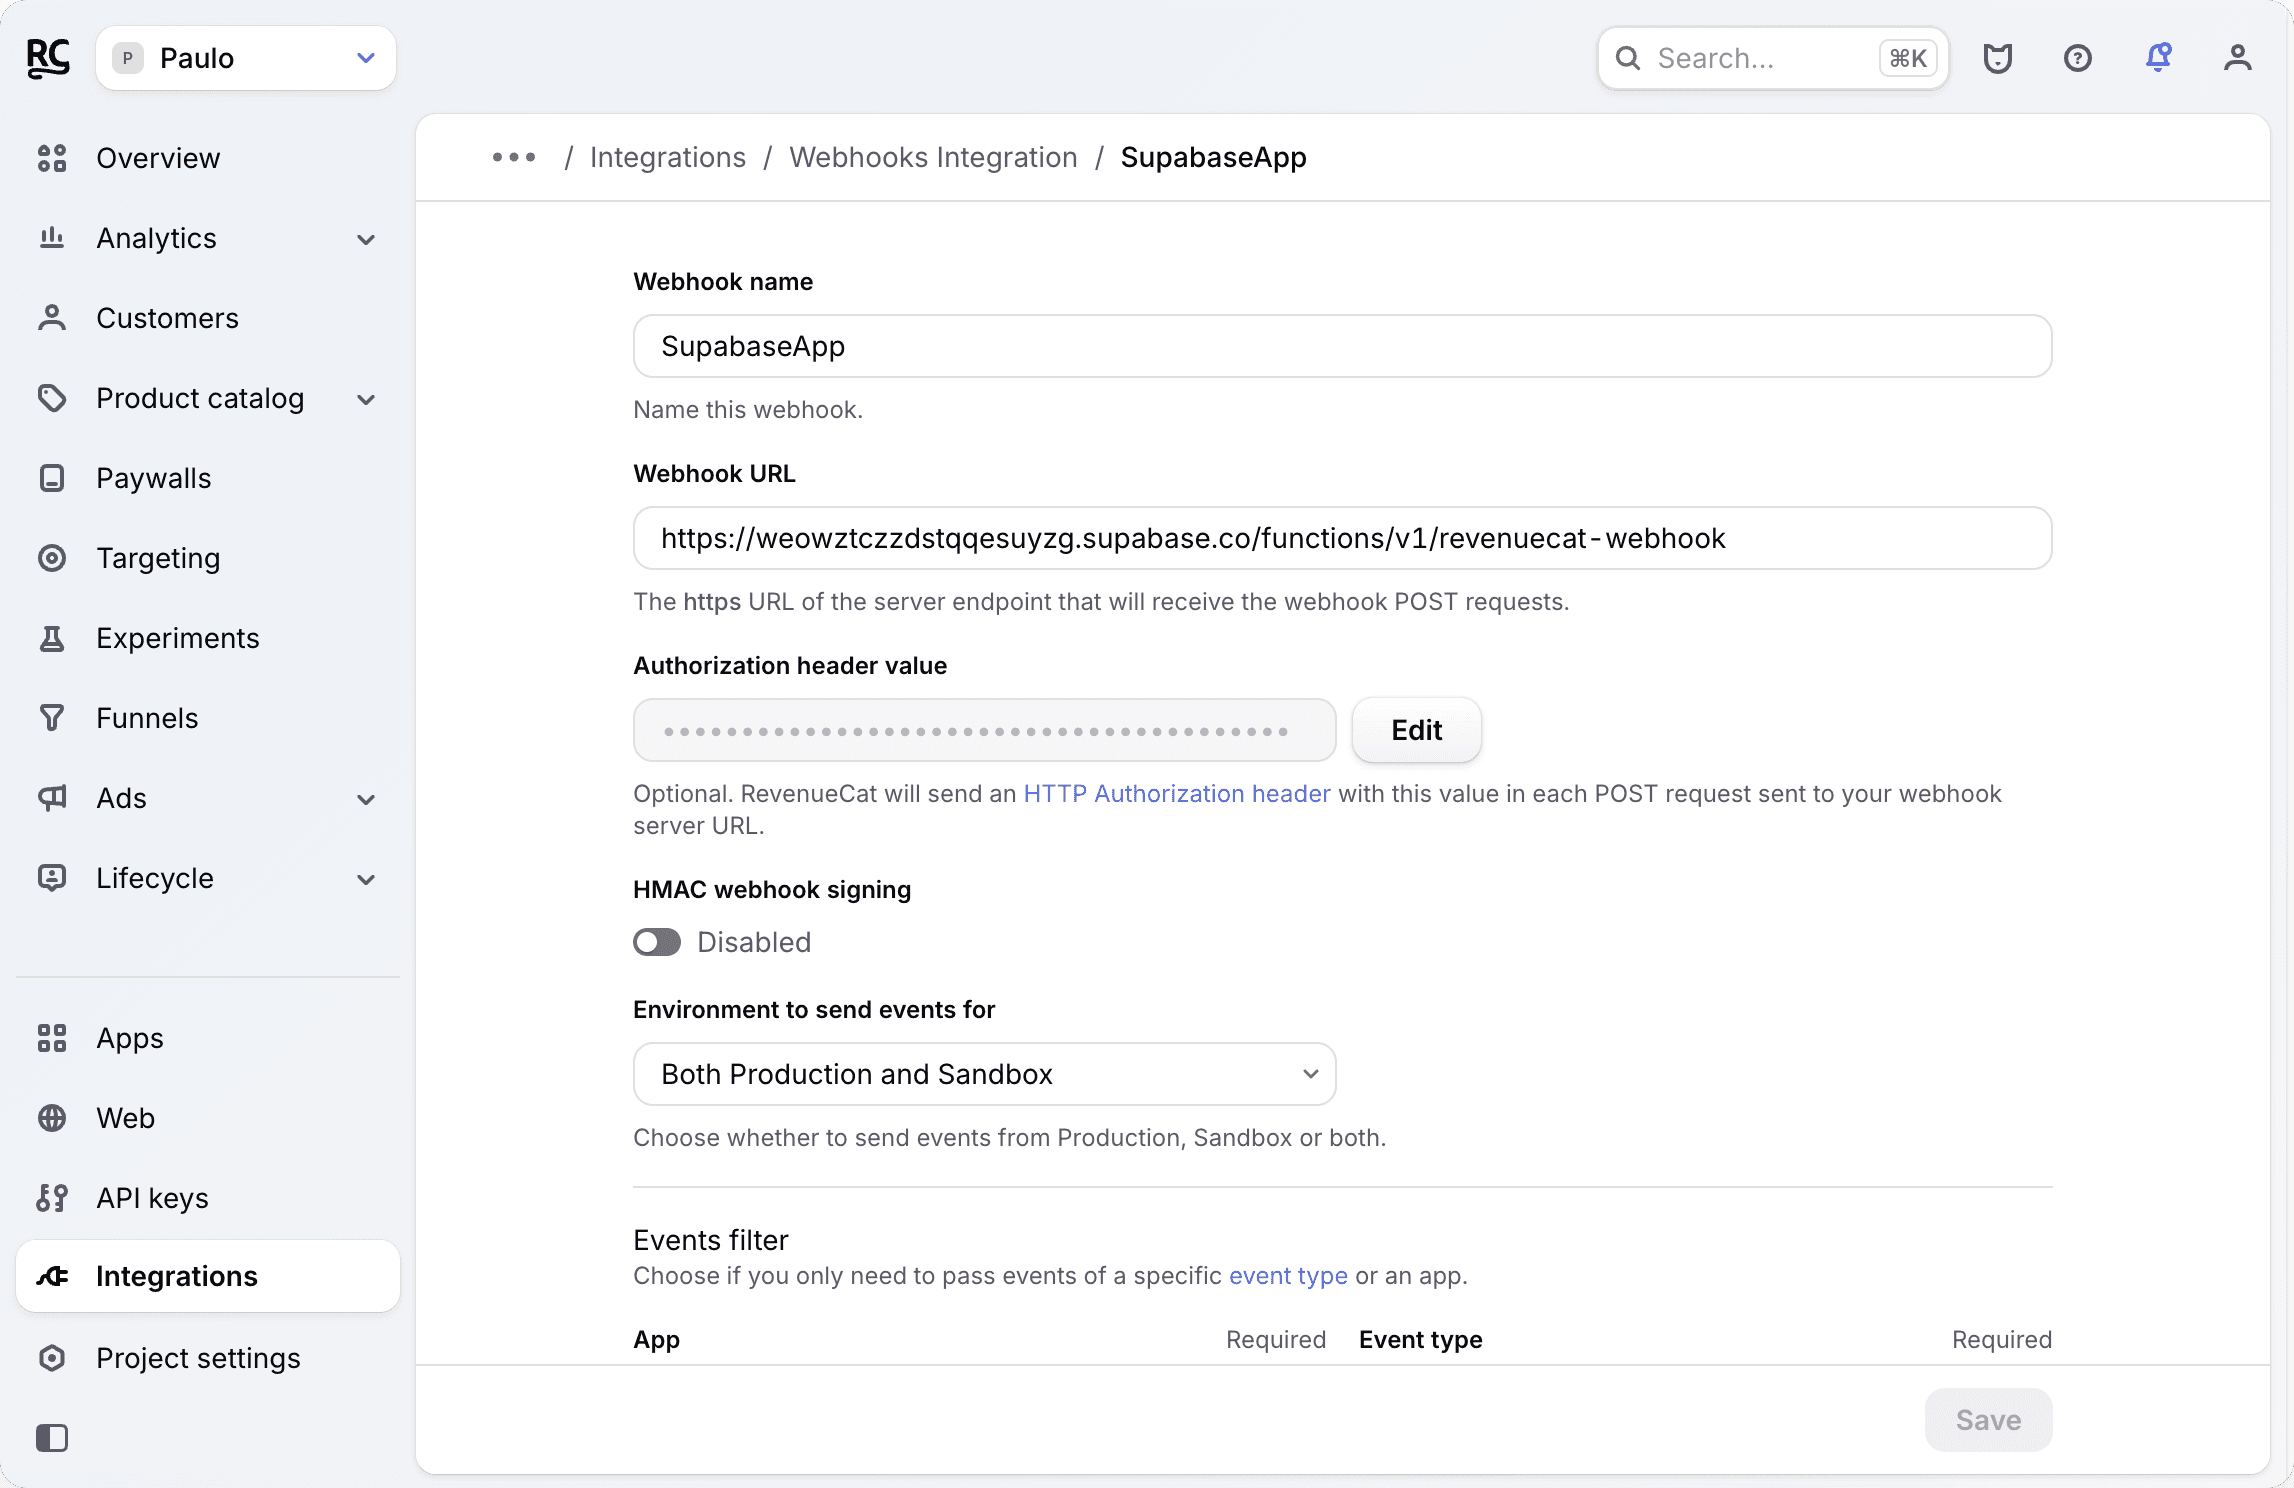
Save this key right away. Supabase doesn't show the value again afterward, only a hash.
To view or change it later:
# Firebase: see the current value
firebase functions:secrets:access REVENUECAT_WEBHOOK_KEY

# Supabase: change the value (include Bearer, the function compares the full string)
supabase secrets set REVENUECAT_WEBHOOK_KEY="Bearer rc_wh_..."
If the two sides don't have the same value, the webhook returns 401 and the subscriptions table stops updating.
To test it: in the RC dashboard, after saving the webhook, click Send test event. If the response is 200 OK, it's working. Then make a purchase through the Test Store and check whether the row shows up in the subscriptions table.
Phase 2: Real Sandbox (iOS)
Needed once the Test Store flow already works and you want to test with a real App Store product.
Cost: USD $99/year (Apple Developer account)
1. Create an Apple Developer account
Go to developer.apple.com and pay the USD $99/year.
2. Set up the business side in App Store Connect
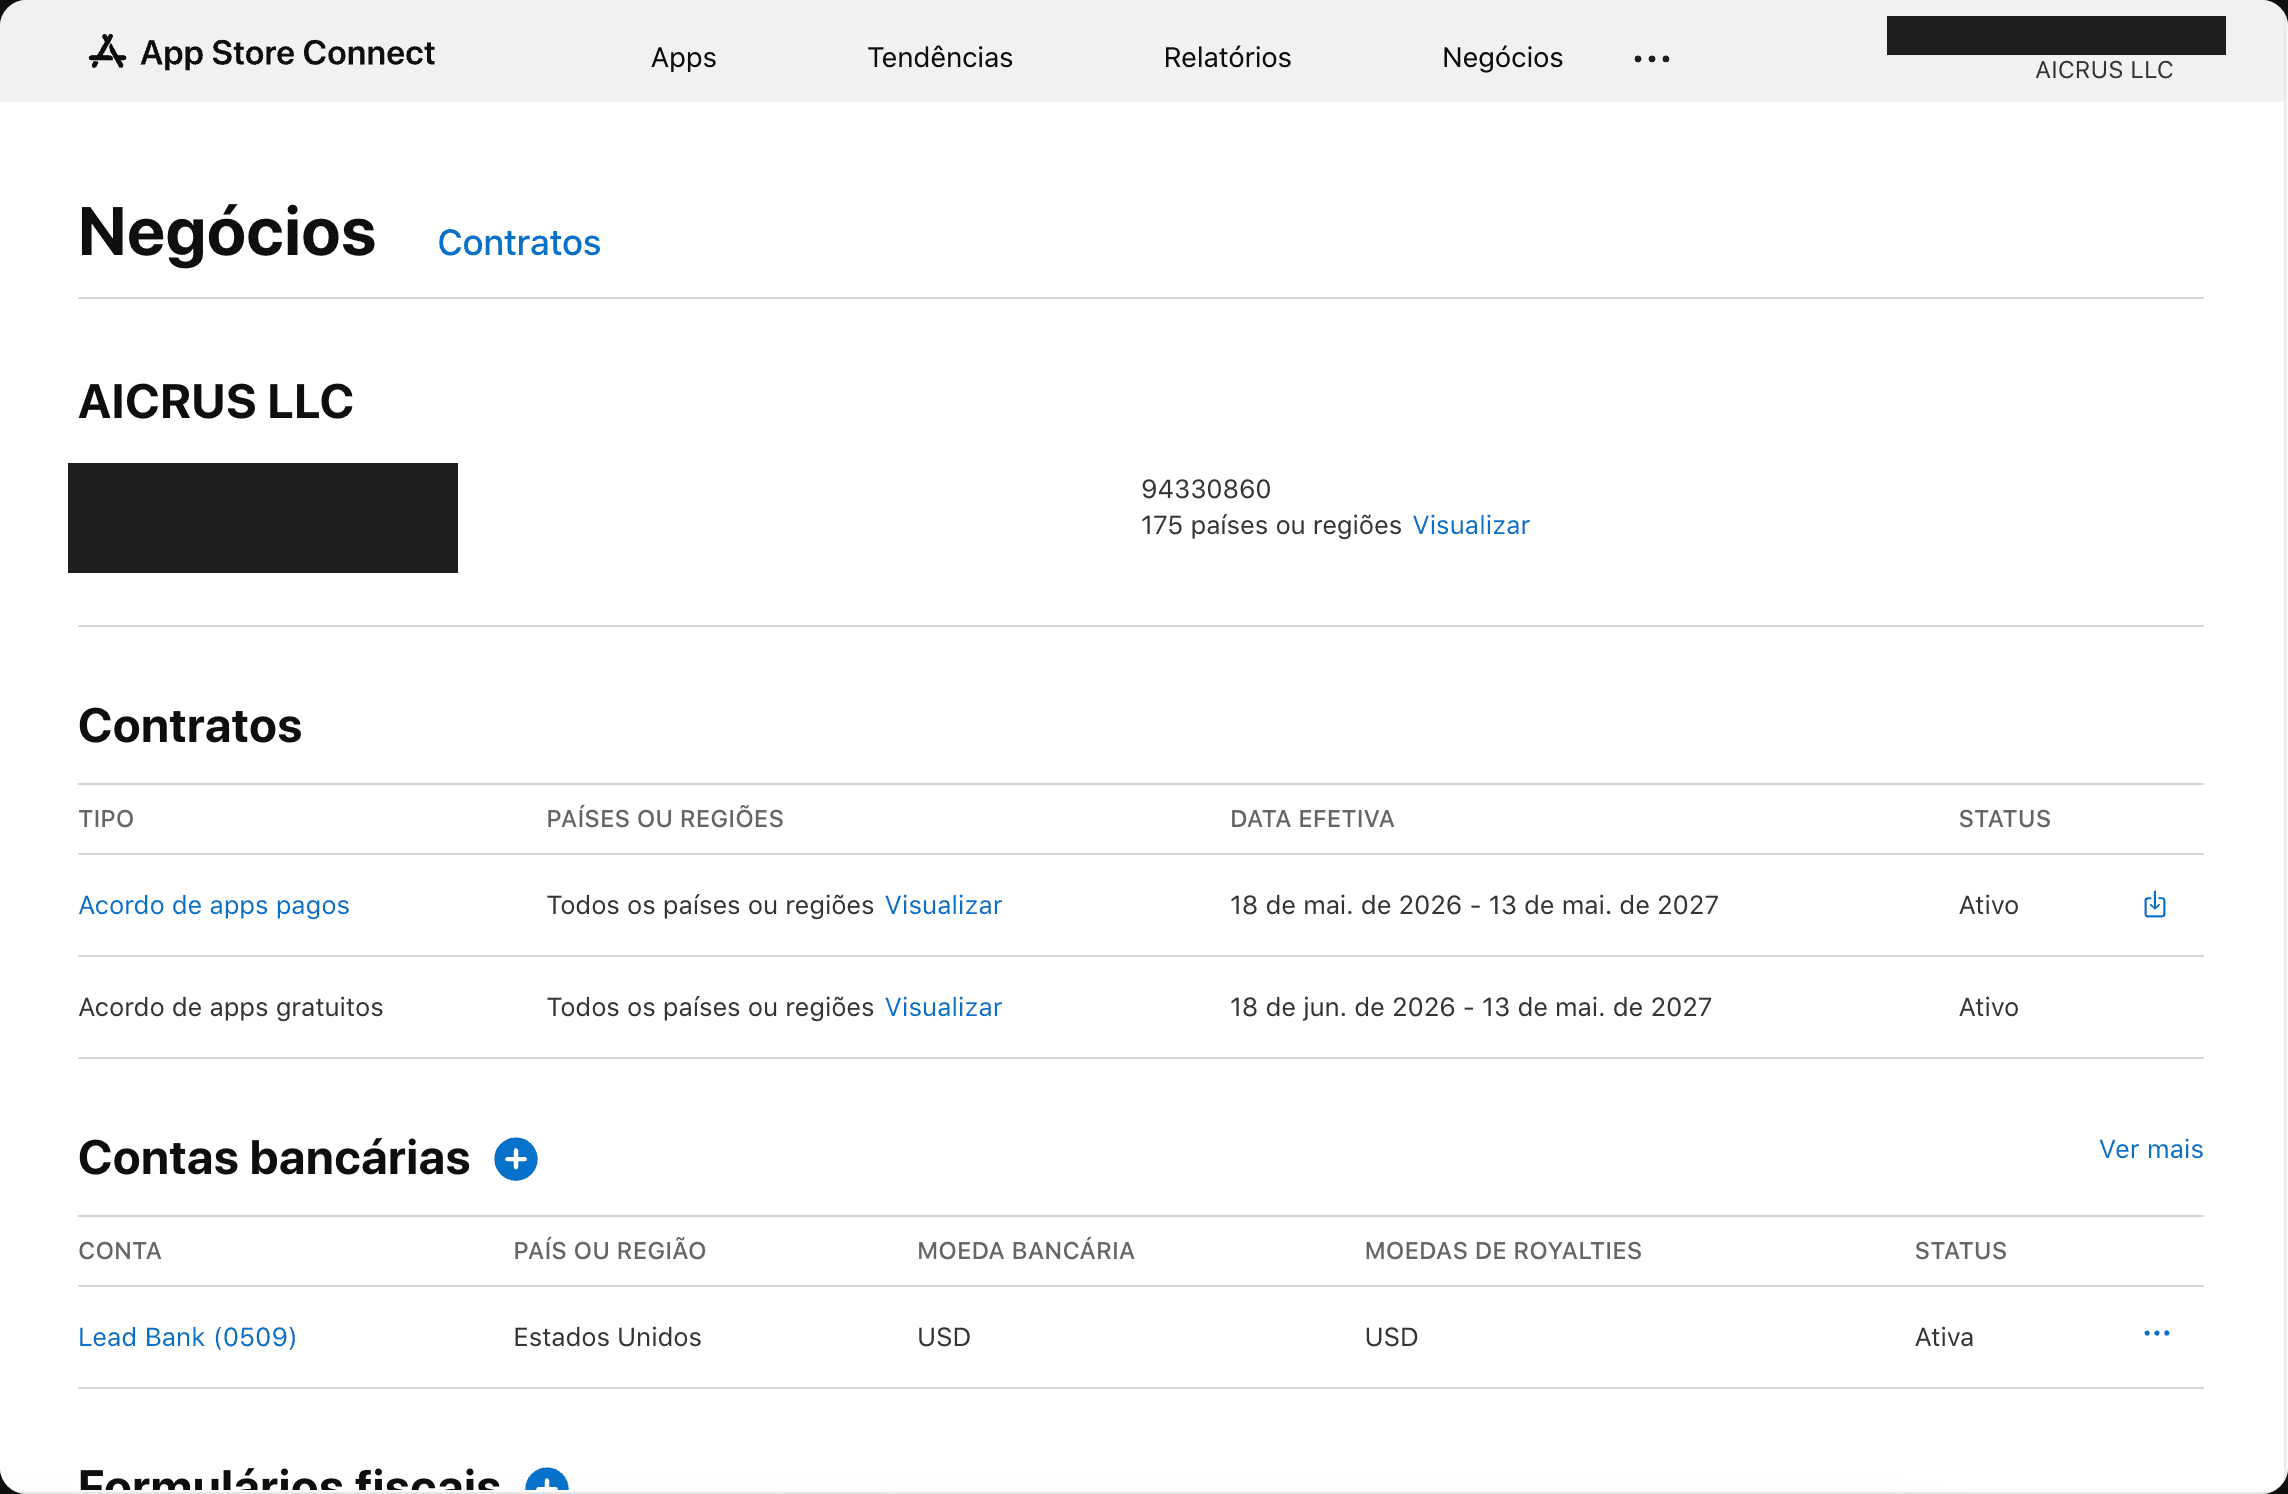
Without this, Sandbox won't work. App Store Connect → top menu → Agreements, Tax, and Banking:
- Sign the Paid Applications Agreement
- Register and validate your bank account
- Fill in the tax forms
Wait for approval (can take up to 1 day).
3. Create the app in App Store Connect
App Store Connect → My Apps → + → New App → use the same Bundle ID as your Flutter project.
4. Create the subscriptions
App Store Connect → your app → Monetization → Subscriptions:
- Create a subscription group (e.g., "Premium")
- Add the products (e.g.,
premium_monthly,premium_annual) - The identifier must be identical to the one you'll create in RevenueCat
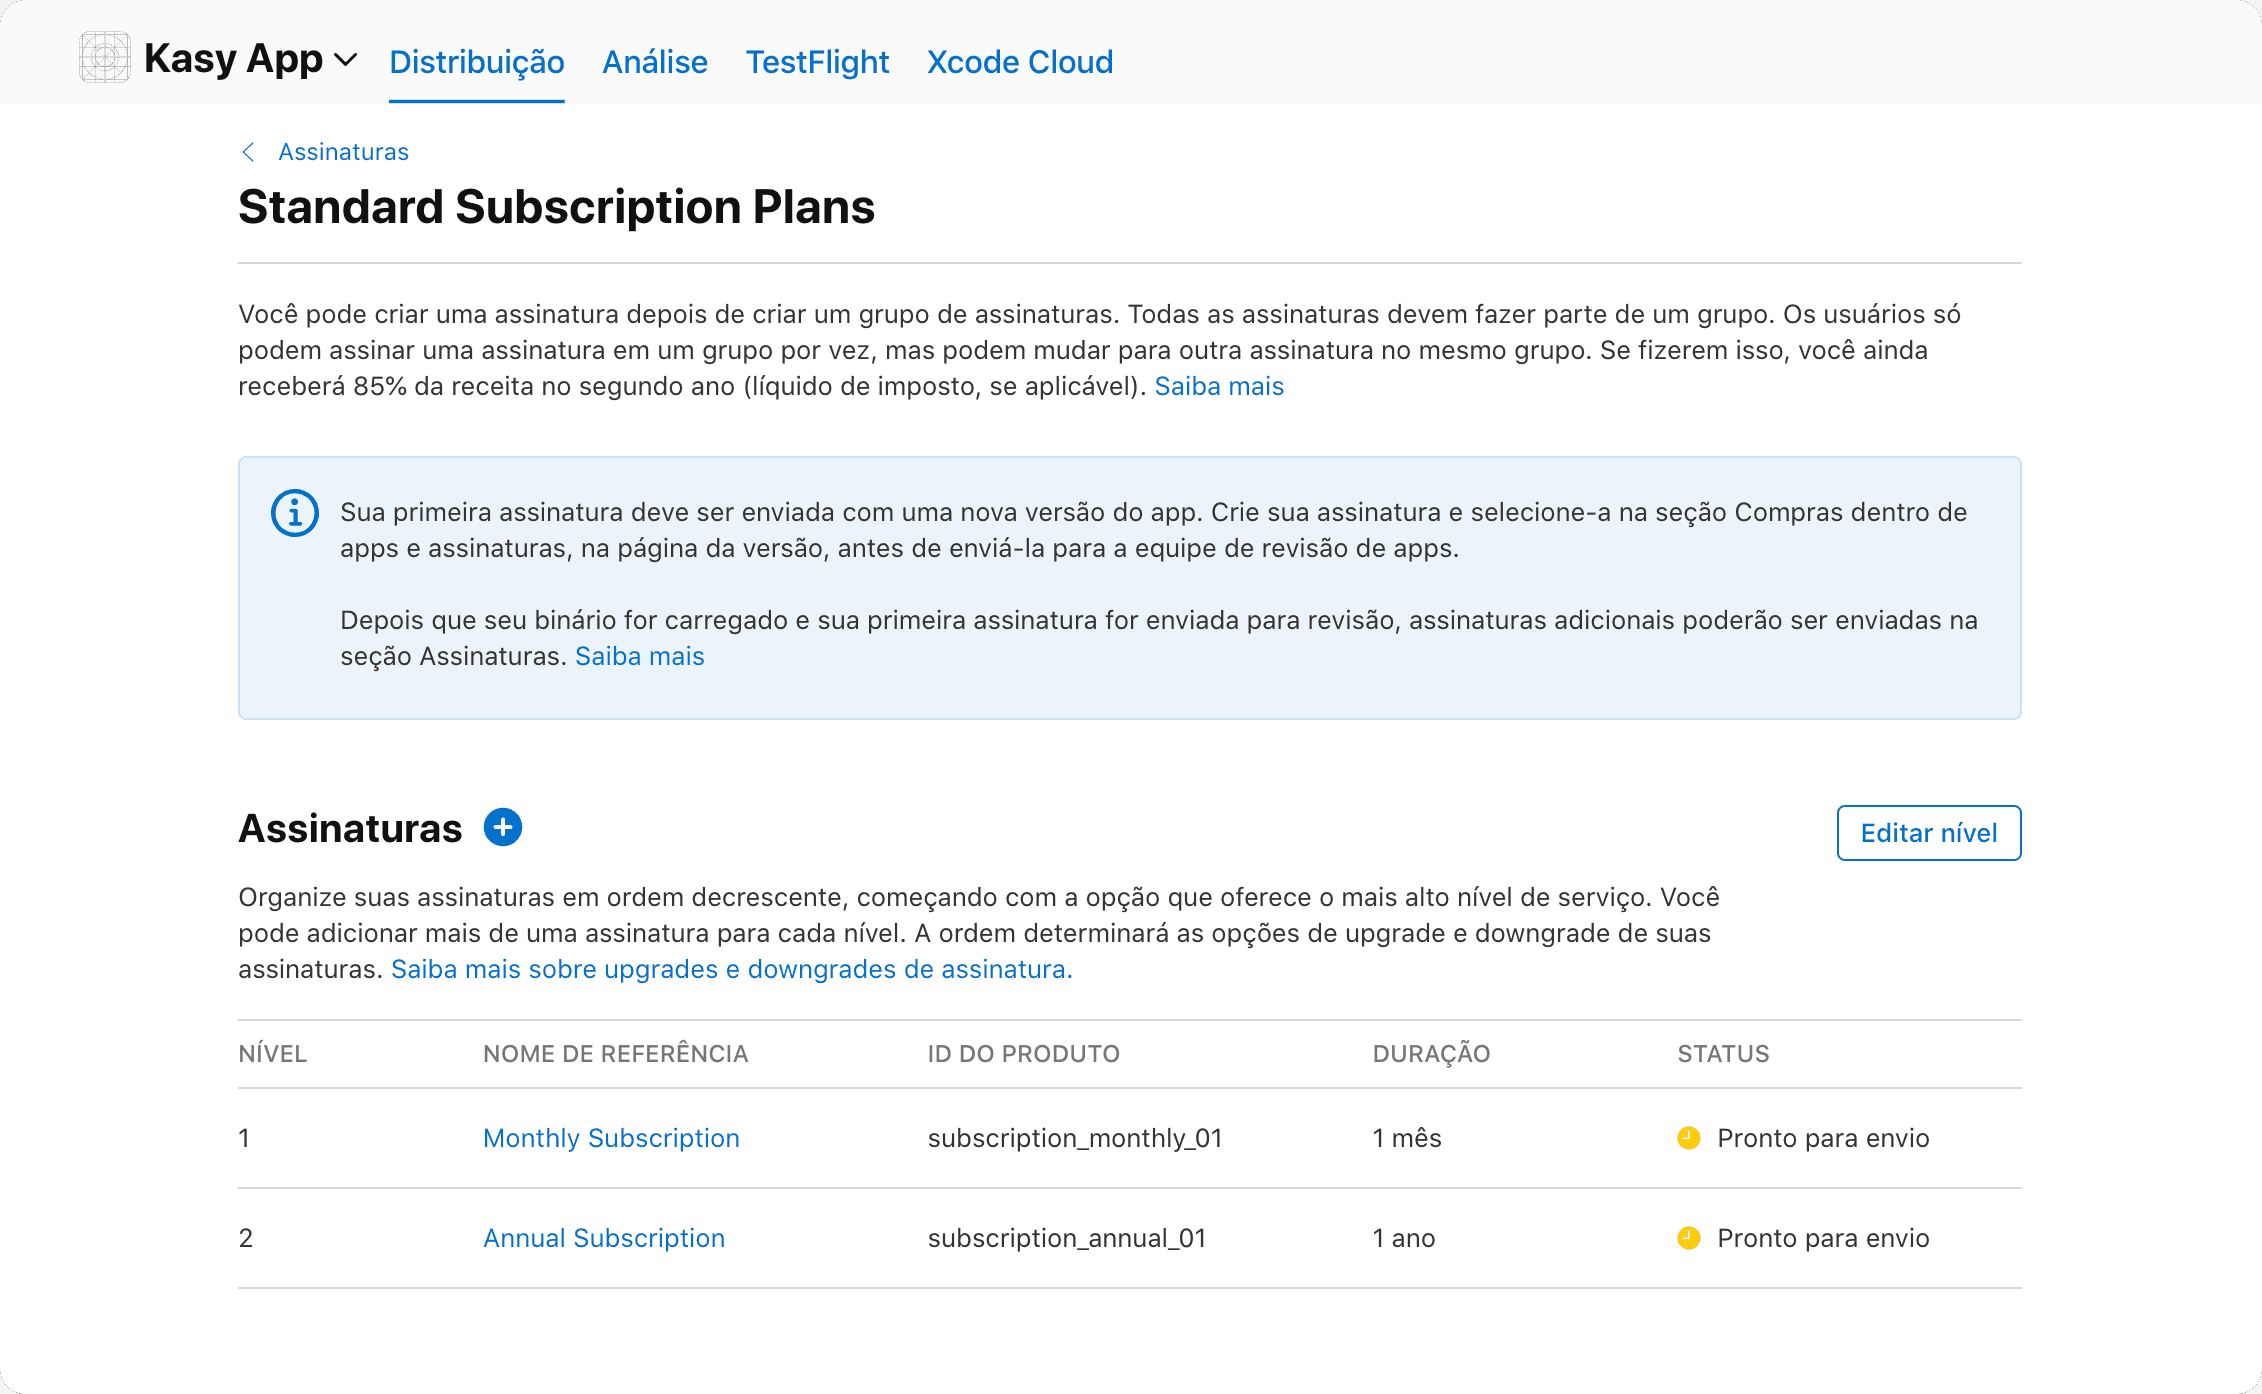
There are two Localization sections, and both are required. Miss either one and everything stays stuck in "Prepare for Submission":
- On the group (this screen, "Standard Subscription Plans") → Localization section → add a language with the group's display name.
- On each subscription (Monthly Subscription, Annual Subscription...) → its own Localization section → add the same language with a display name and description.
Missing either one blocks submission for review.
5. Configure RevenueCat with the Apple key
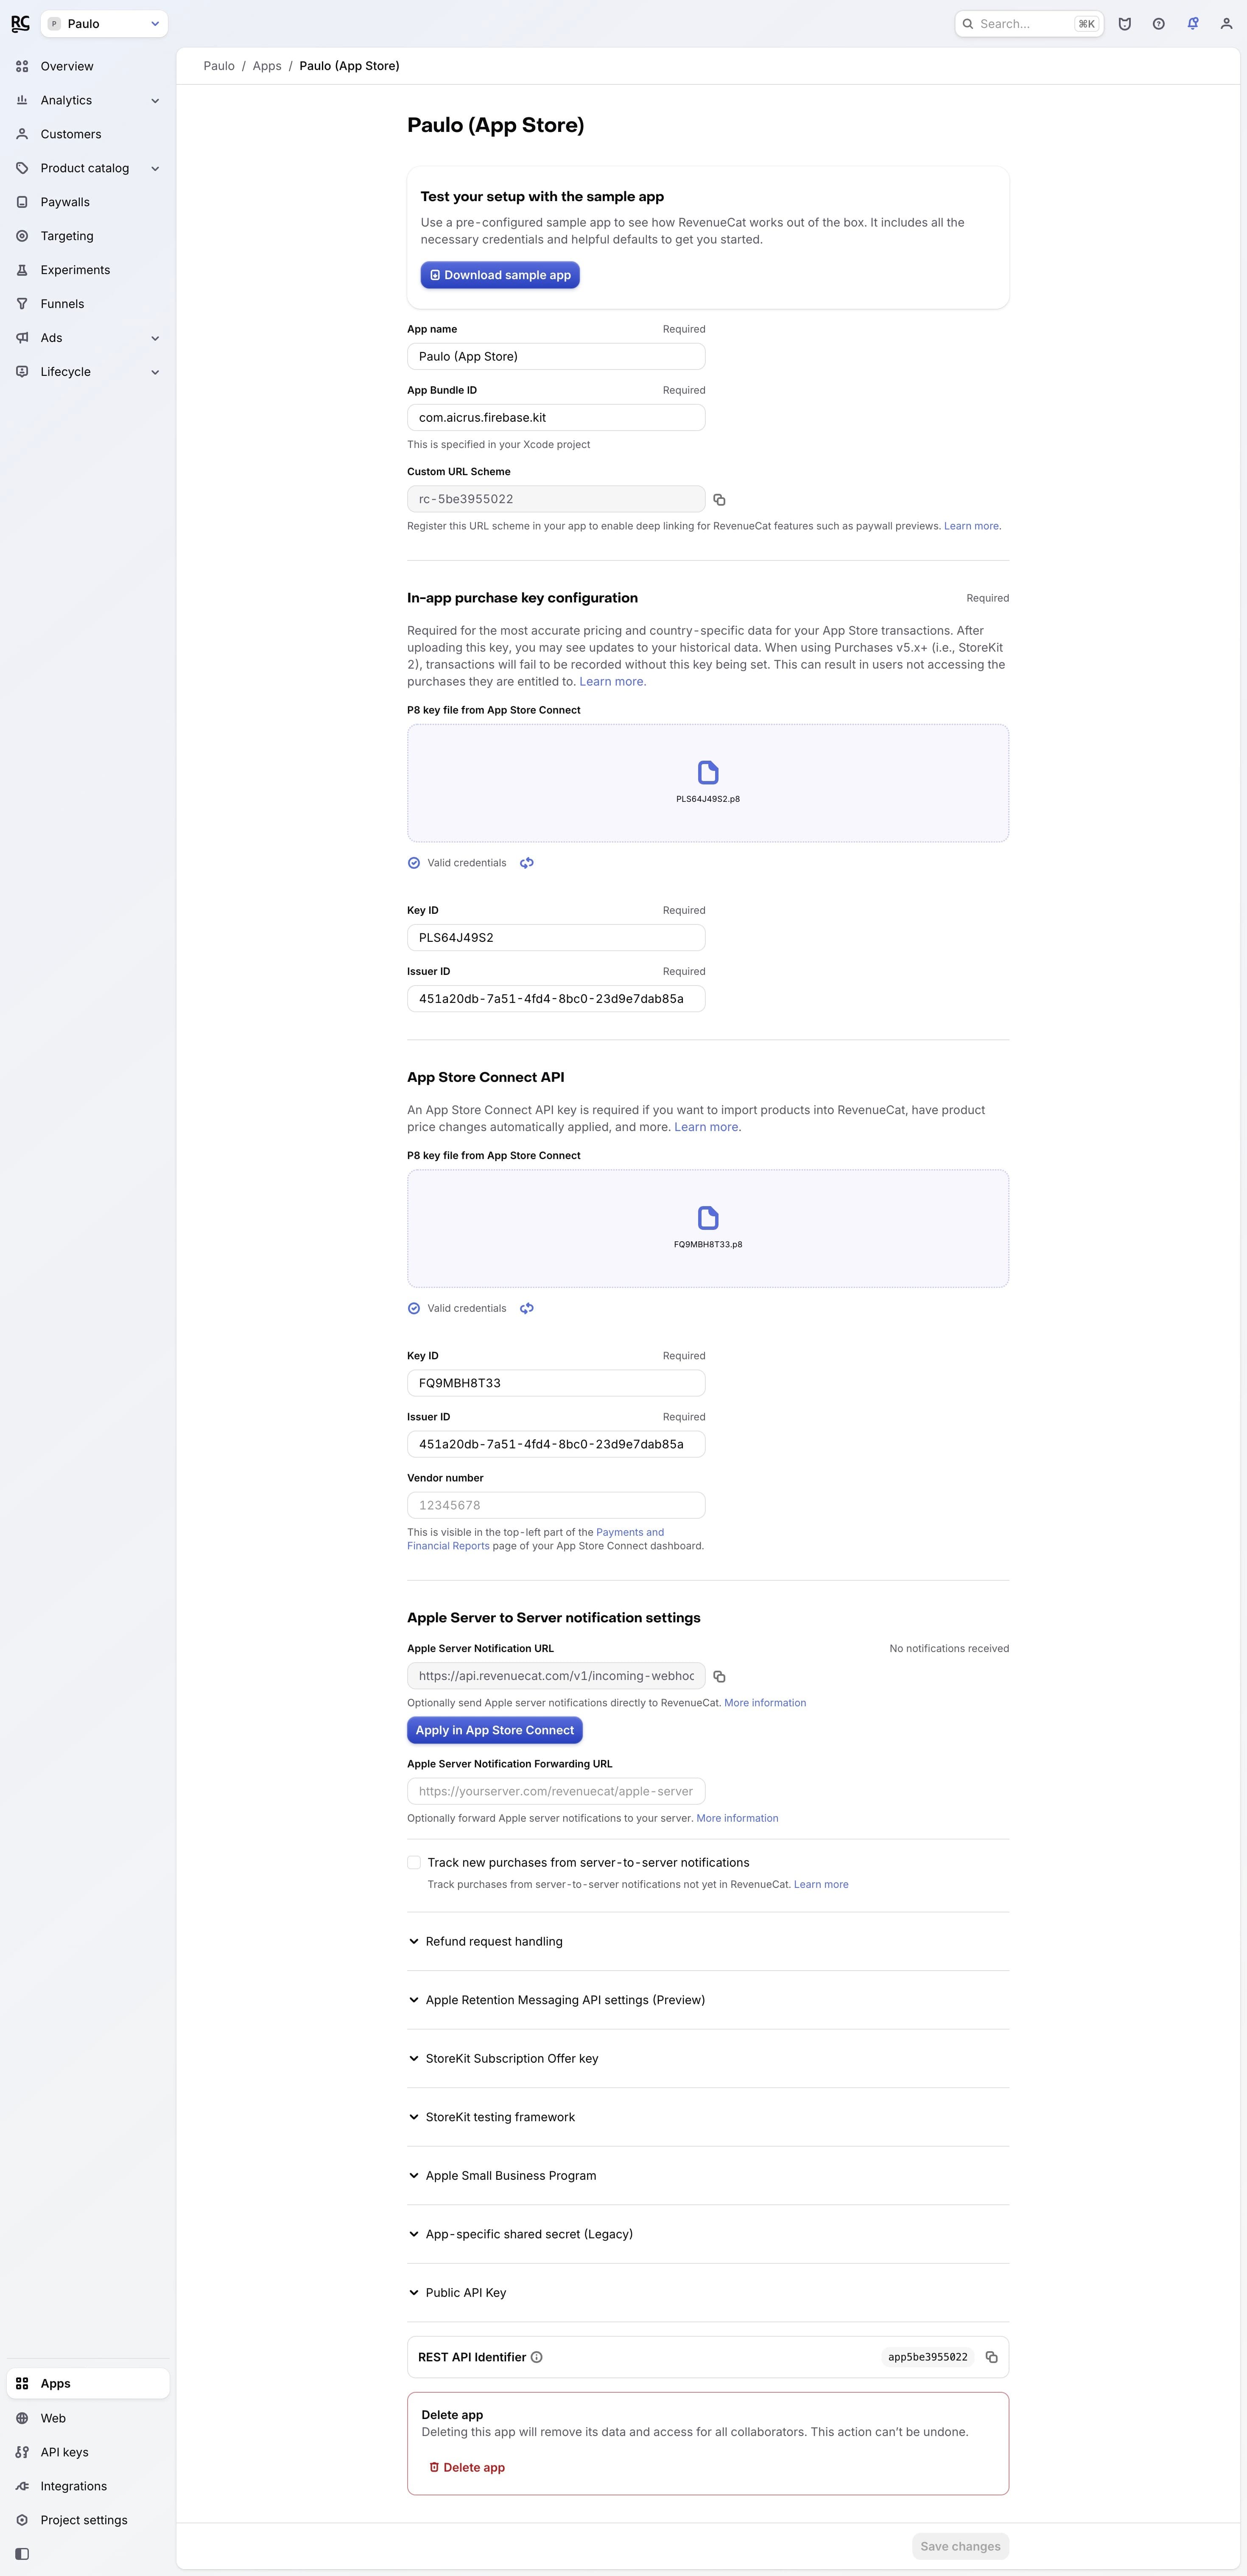
In the RC dashboard → Project → Apps → + Add app → App Store → copy the appl_xxx key.
Paste it into the .env:
RC_IOS_PROD_KEY=appl_xxxxxxxxxxxxxxx6. Create Products, Entitlements, and Offerings in RC
With the appl_xxx key active:
- Products → create them with the same IDs as the App Store Connect subscriptions
- Entitlements →
premium_access→ attach the products - Offerings →
default→ add the packages
7. Create a Sandbox Tester account
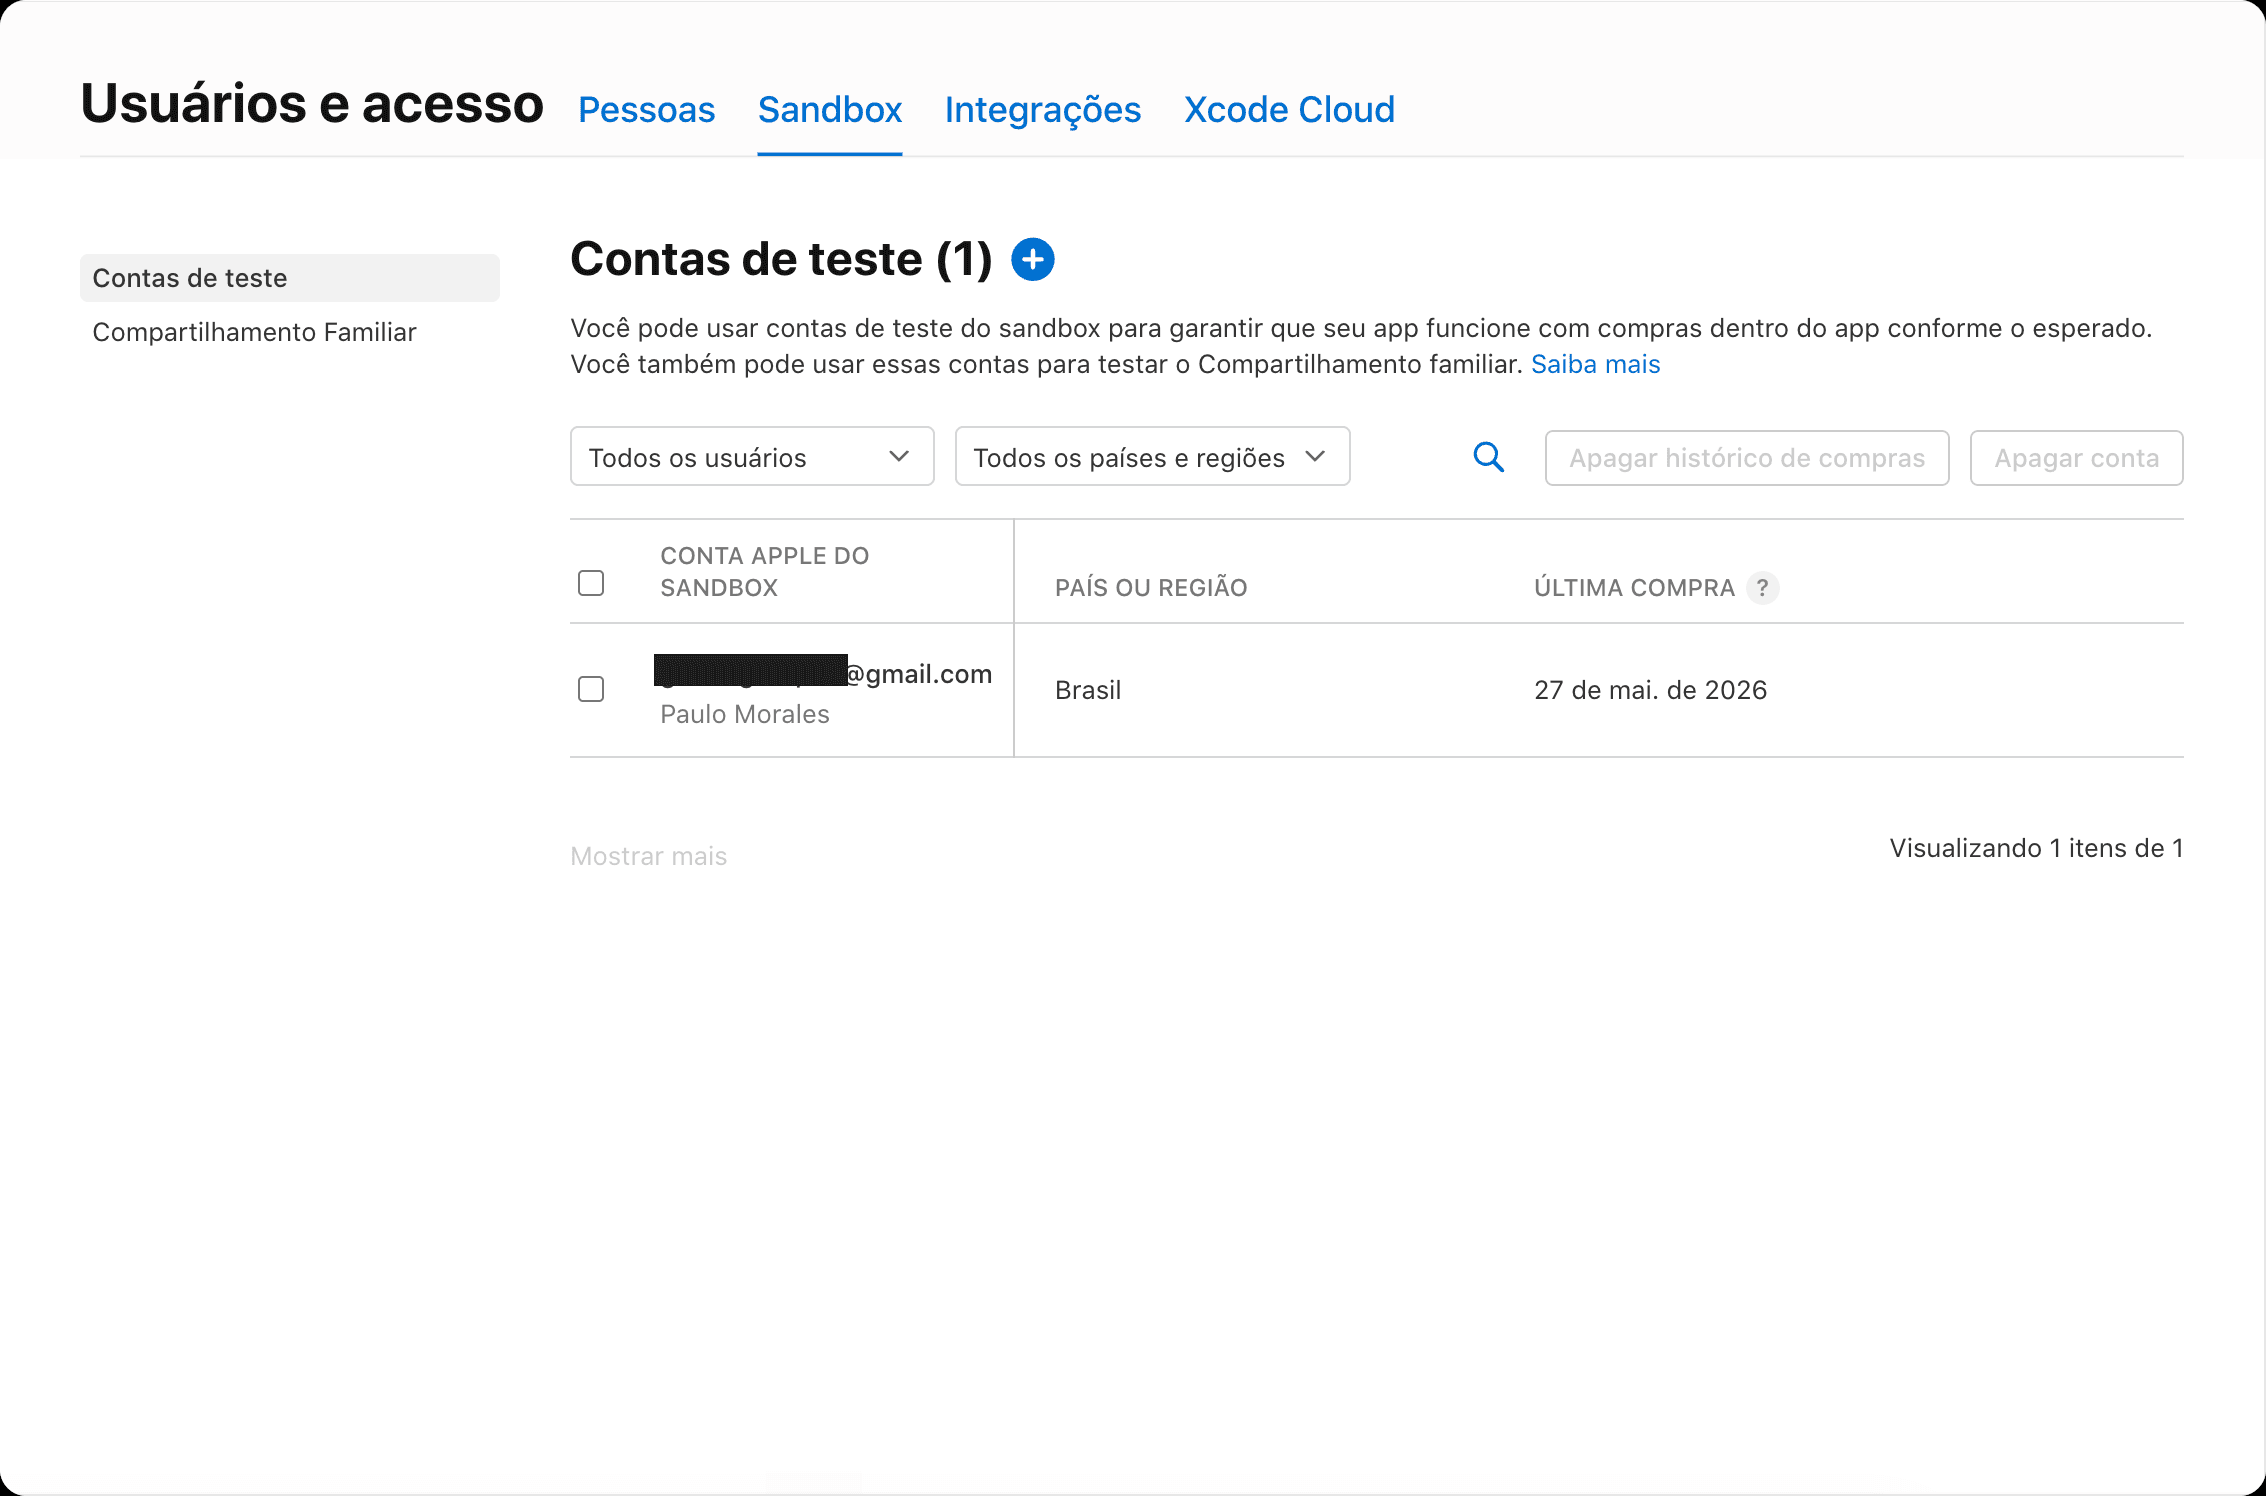
App Store Connect → Users and Access → Sandbox tab → Testers → + → create it with a fake email.
8. Connect the Sandbox Tester on the iPhone
On the physical iPhone: Settings → App Store → Sandbox Account → Sign In with the created Tester's email/password. In recent iOS versions the field lives under Settings → Developer → Sandbox Apple Account (only visible with Developer Mode enabled).
What if the app came from TestFlight? An app installed through TestFlight already runs in a sandbox environment and the purchase is never charged. Even so, Apple recommends signing in with the Sandbox Apple Account so you can test the subscription scenarios: sign out of your production account under Media & Purchases and sign in with the sandbox one under Developer settings.
In TestFlight the renewal rate is accelerated: each subscription renews daily, up to 6 times within a 1-week window, regardless of the plan's real duration.
9. Test
kasy run # detects the physical iPhone and uses RC_IOS_PROD_KEY automaticallyMake a purchase: Apple's real modal shows up. Confirm it and the entitlement should activate.
Phase 2: Real Sandbox (Android)
Cost: USD $25 (one-time)
1. Create a Google Play Developer account
Go to play.google.com/console and pay the USD $25.
2. Set up the Merchant Account
Google Play Console → Settings → Developer account → Payments profile → fill in your legal name and business address. Banking and tax details are not requested at this stage, those only come up later, once the first sale happens.
If you already have a payments profile shared with Google Workspace (or another Google product) and creating the subscription fails with an account-hold error, create a dedicated payments profile just for Play Console: you don't need to reuse the organization's profile or re-enter banking details, just name and address.
3. Create and publish to the internal track
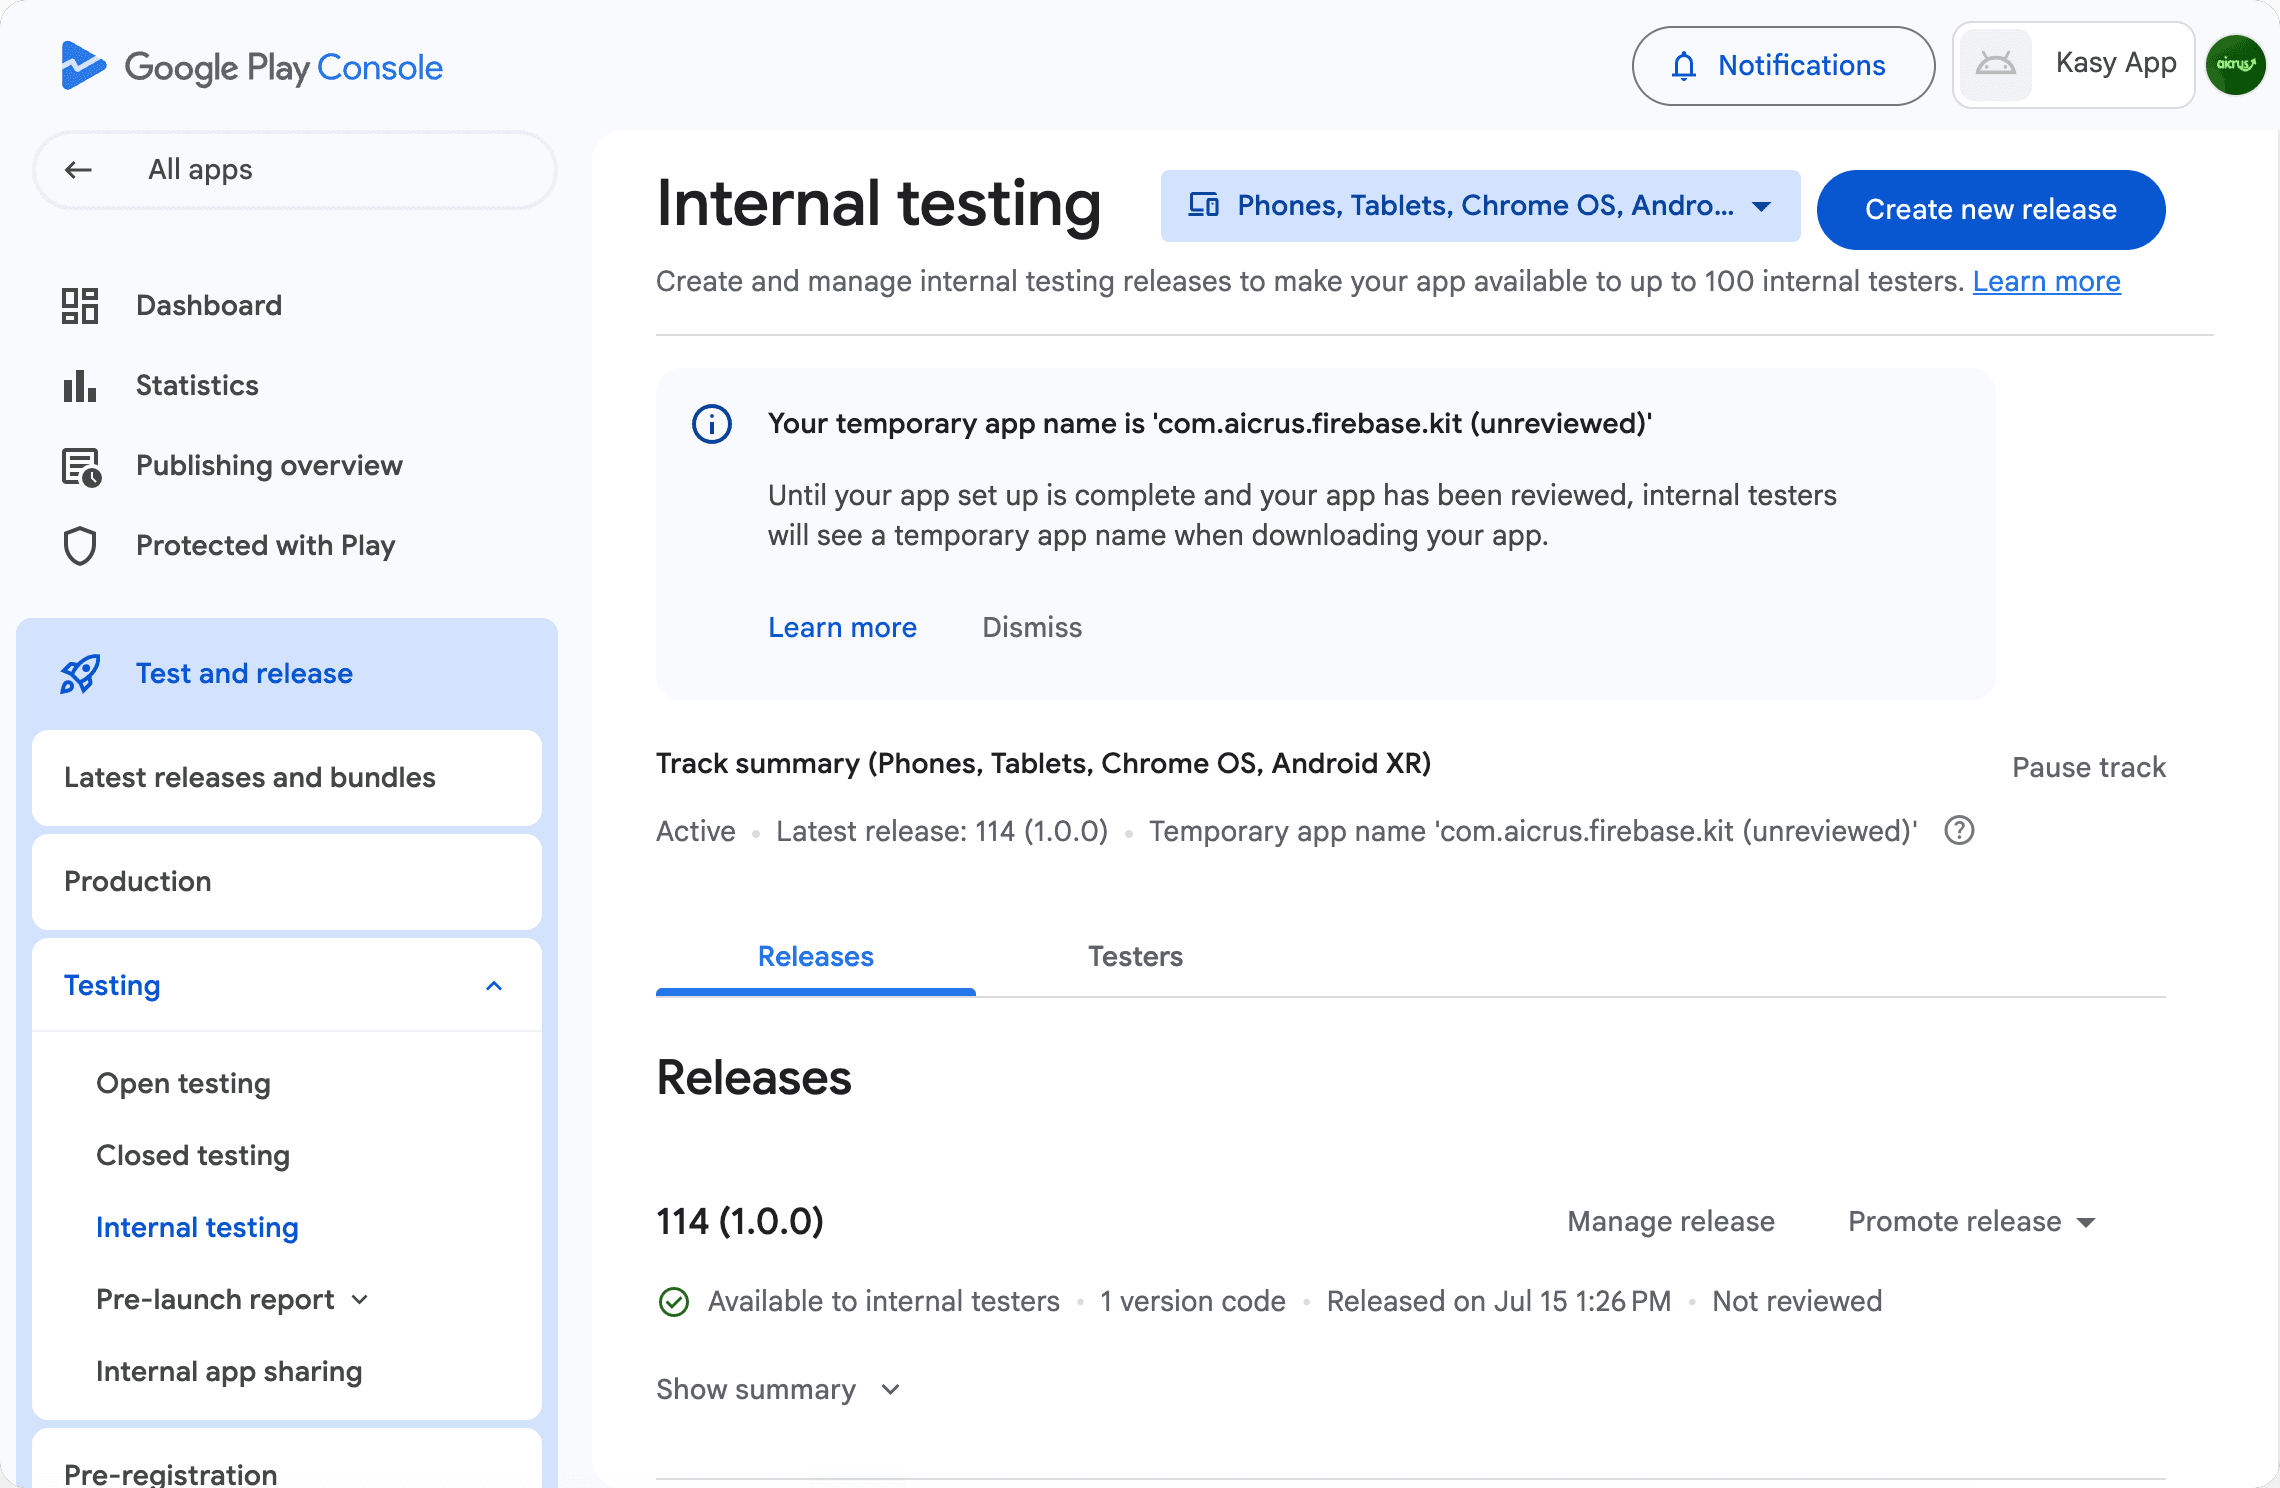
Generate a signed APK/AAB and upload it: Testing → Internal testing → create release → publish.
The app doesn't need to be finished. A signed development build is enough. This is required before you can create subscriptions.
4. Create the subscriptions
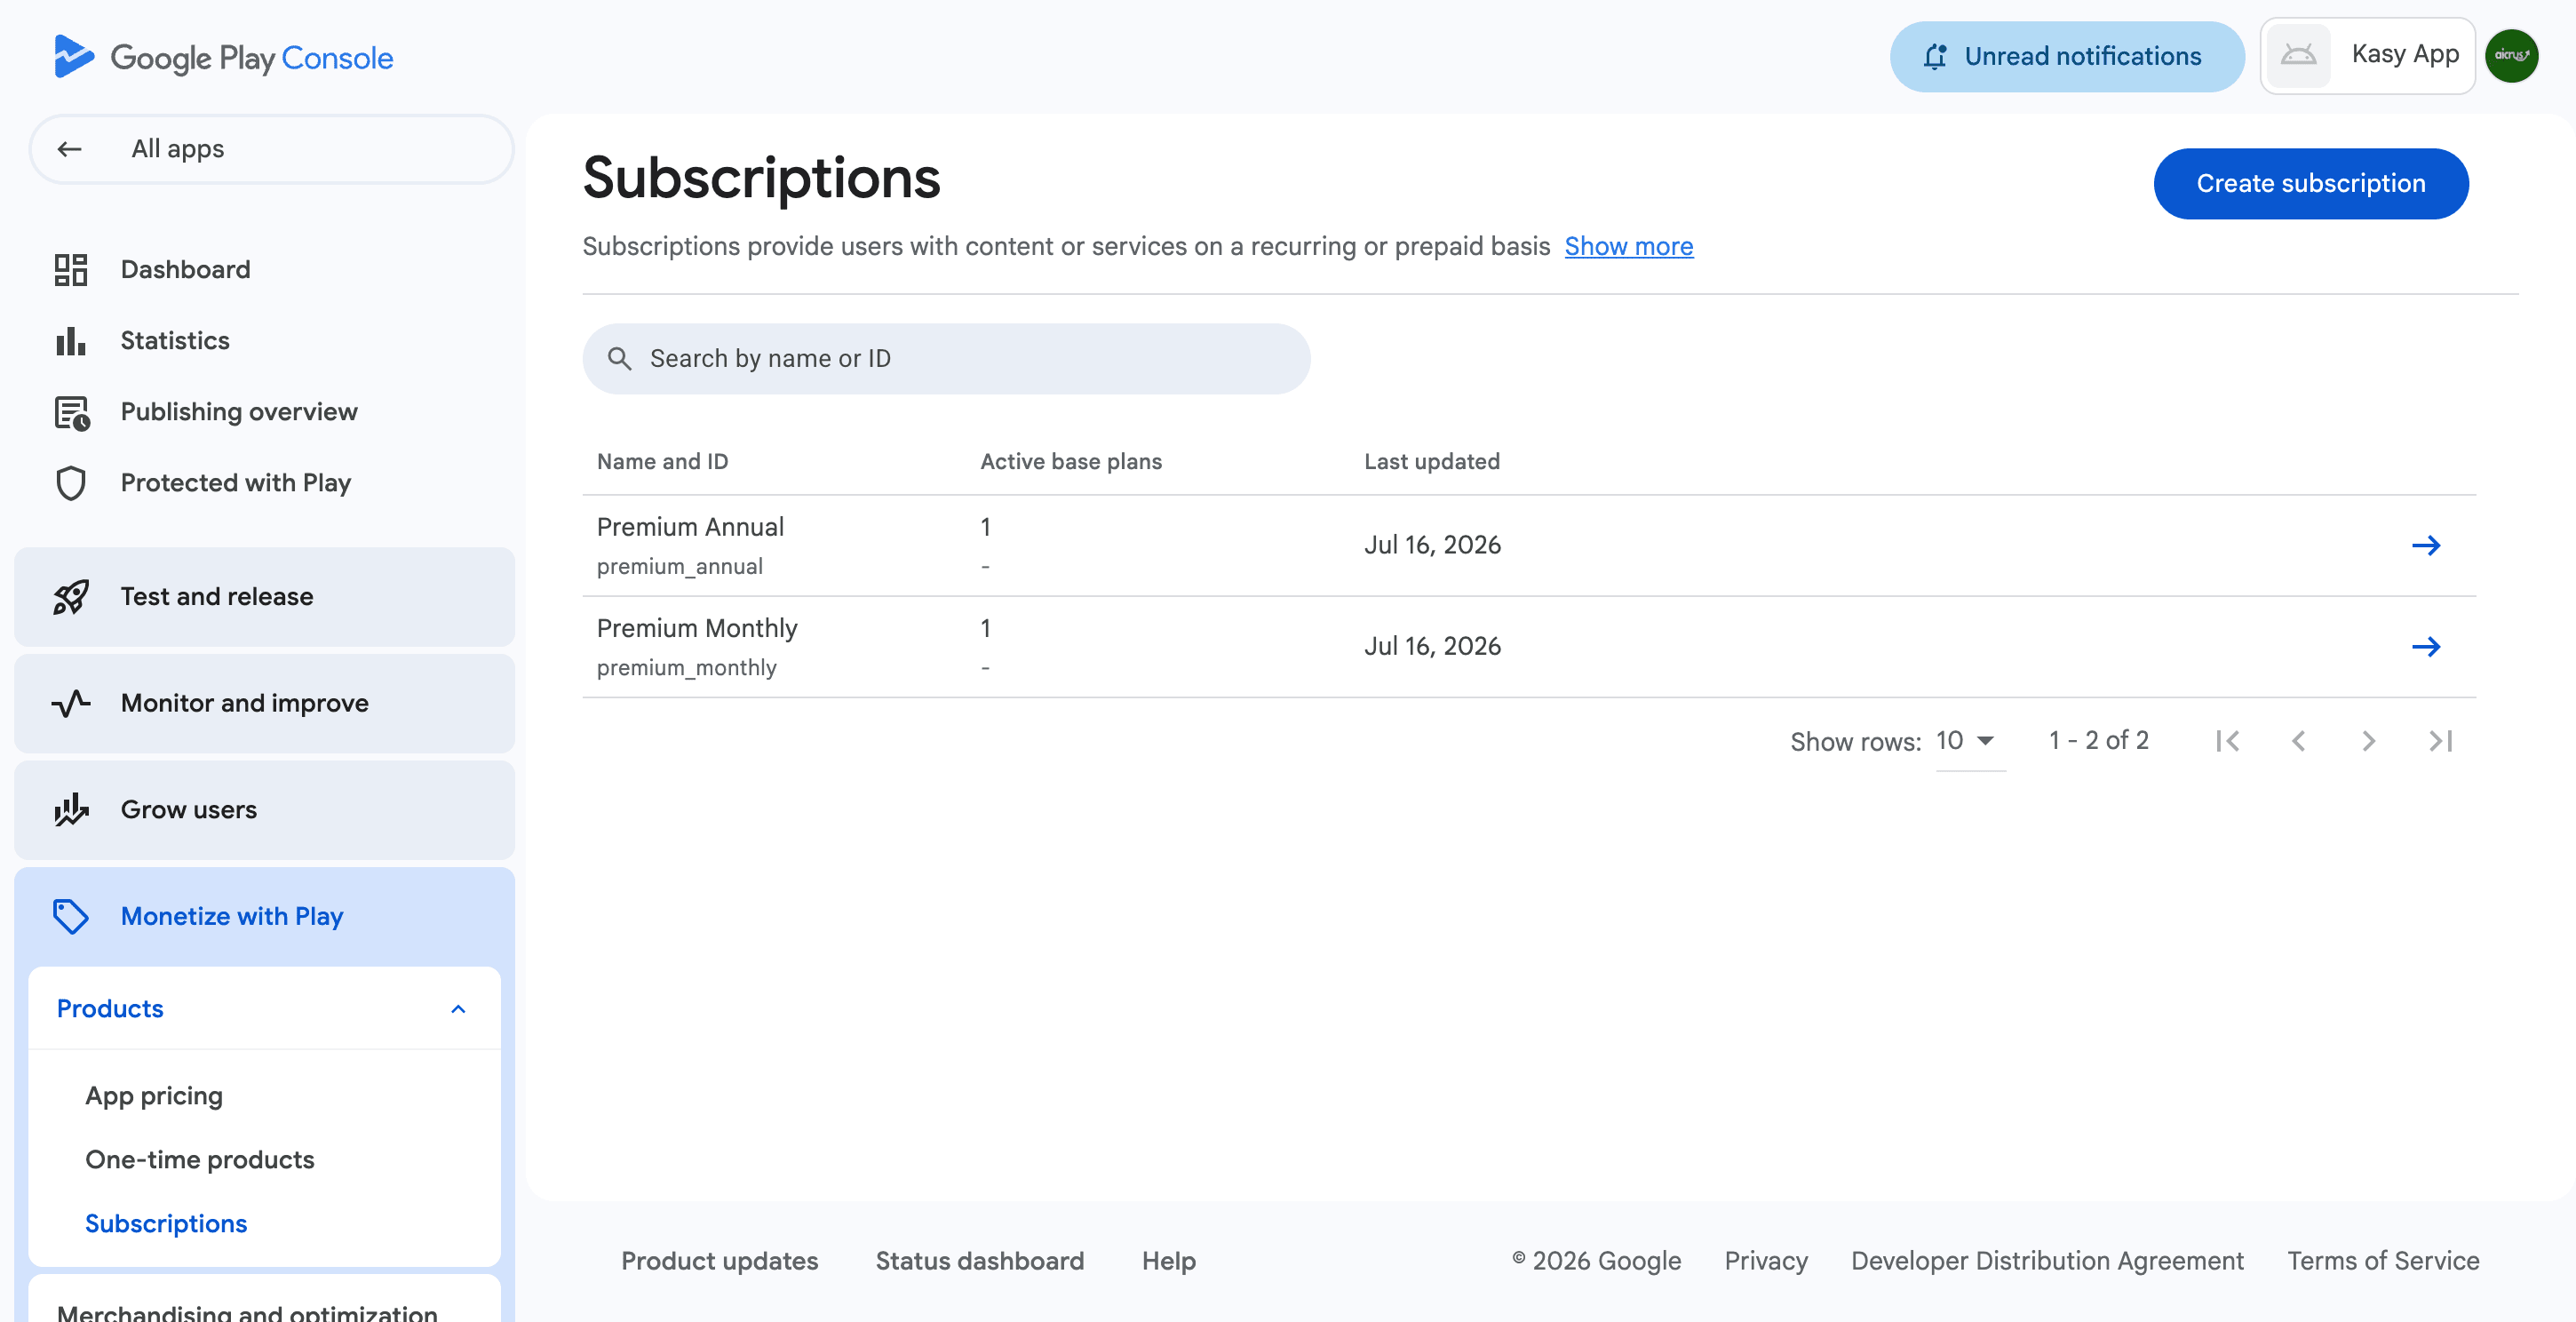
Google Play Console → your app → Monetize → Subscriptions → + Create subscription:
- Create
premium_monthly,premium_annual - The identifier must be identical to the one you'll create in RevenueCat
5. Create a Service Account and configure RC
Android uses a Service Account:
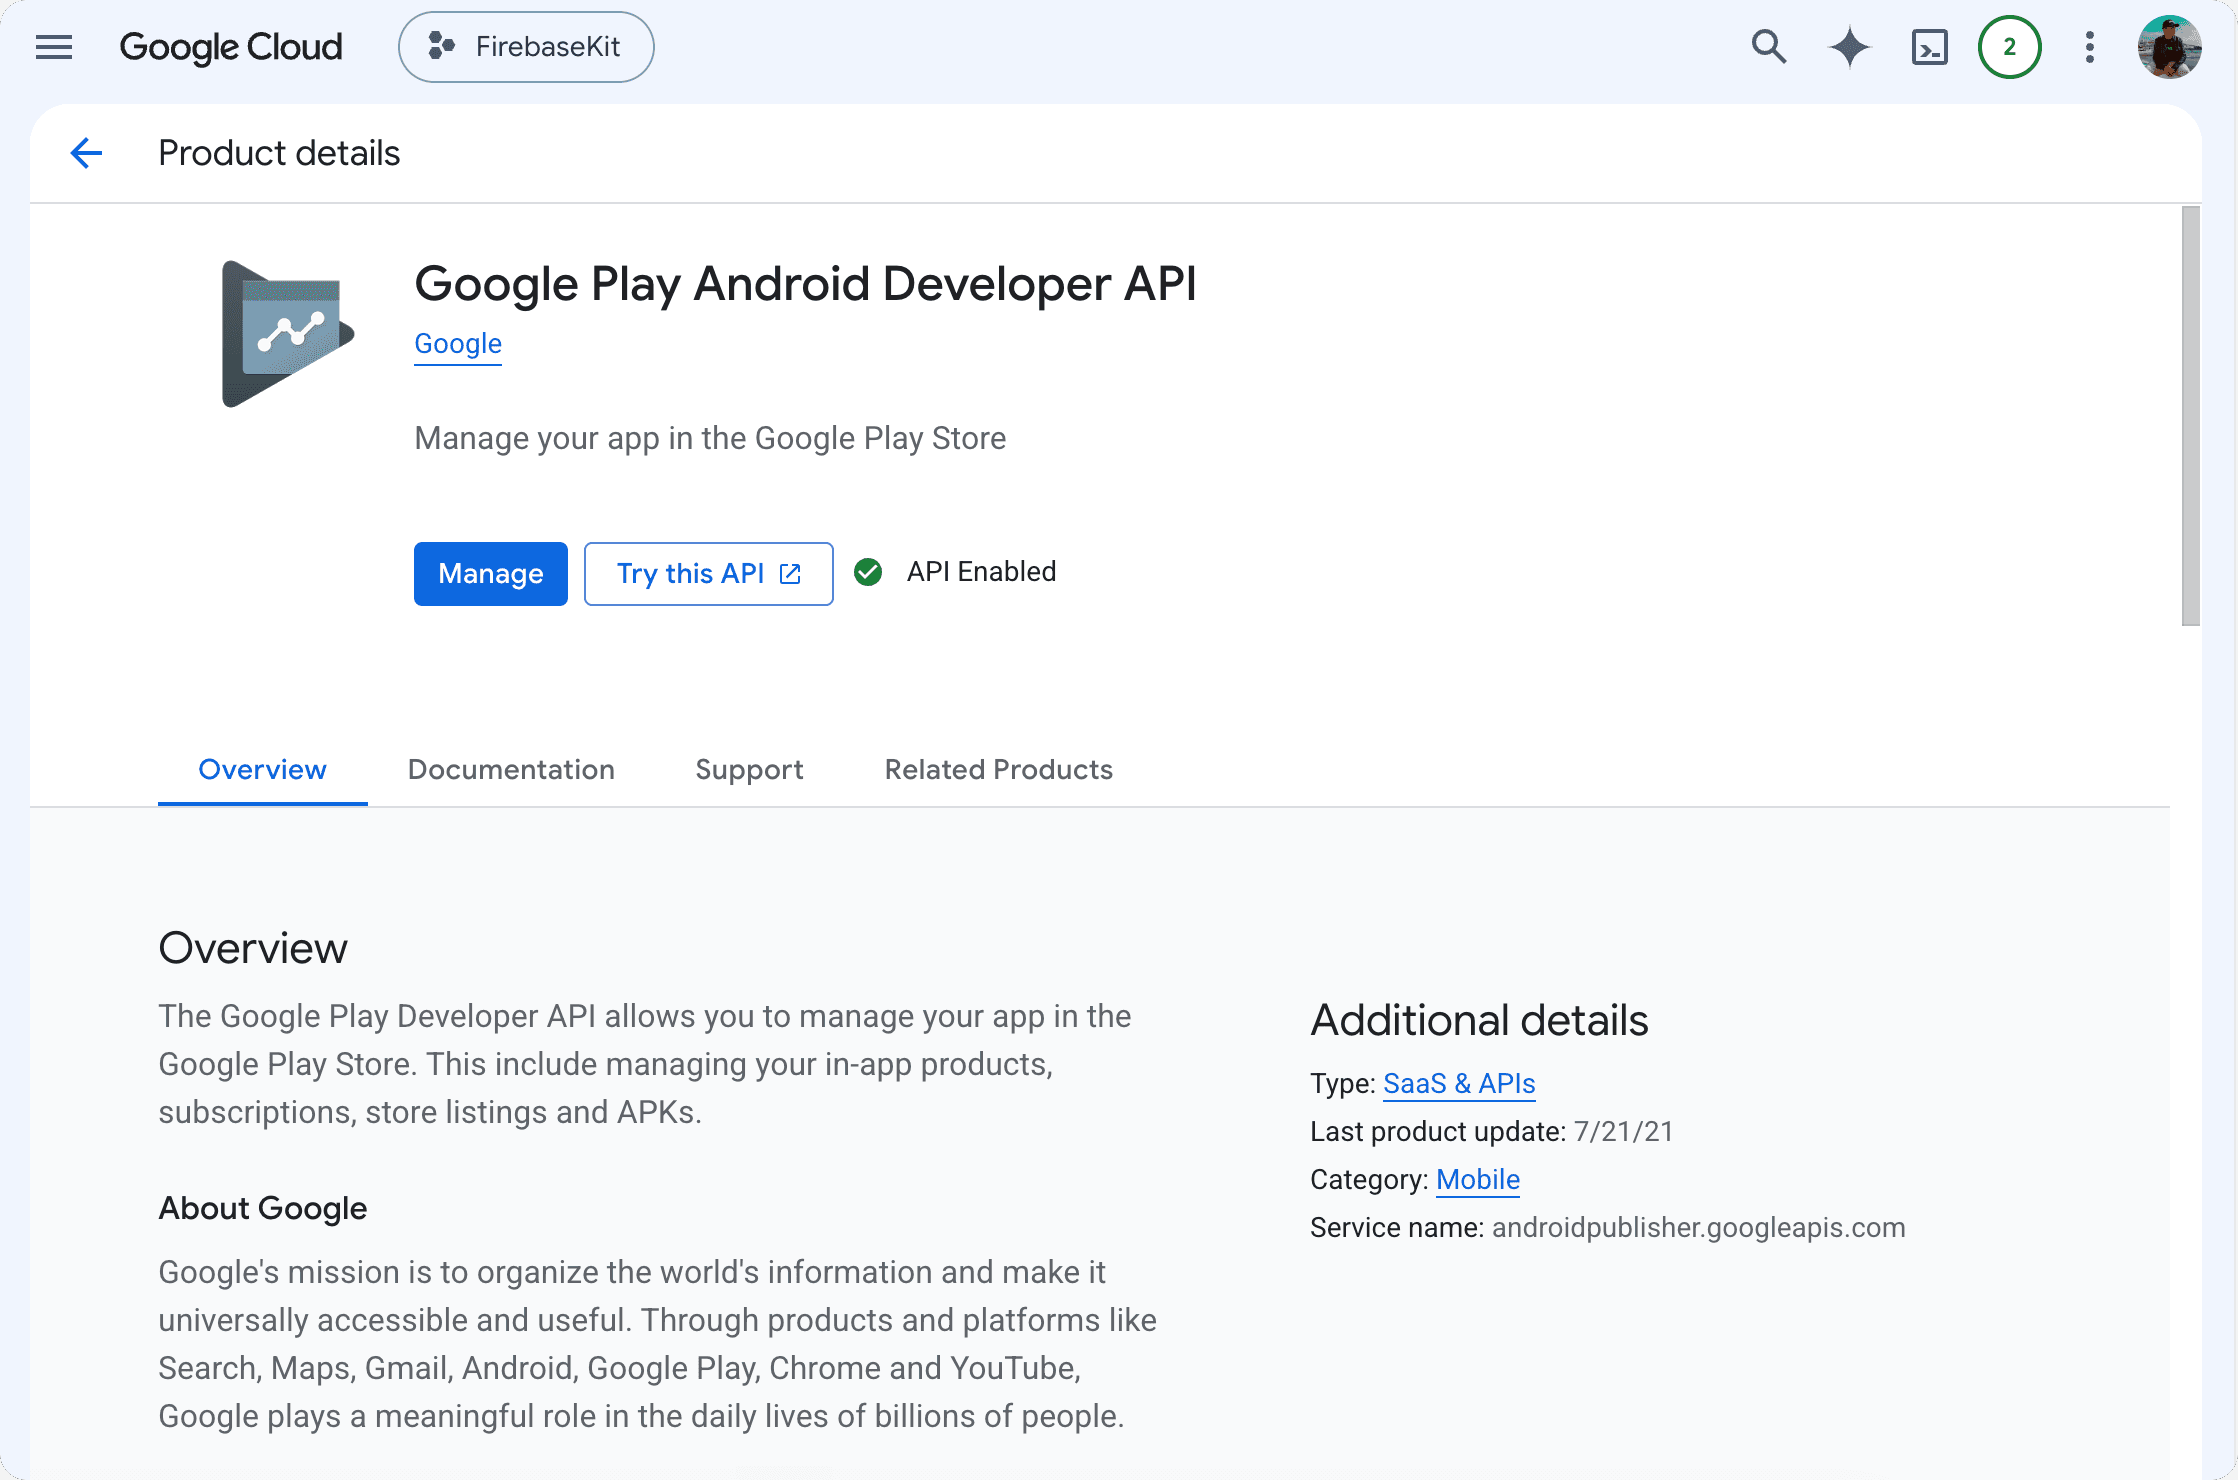
a) Google Cloud Console → your project → APIs & Services → Library: enable Google Play Android Developer API and Google Play Developer Reporting API
First time using Google Cloud Console with this Google account? It'll ask you to accept the Google Cloud Platform Terms of Service before showing any project. Just a one-time thing.
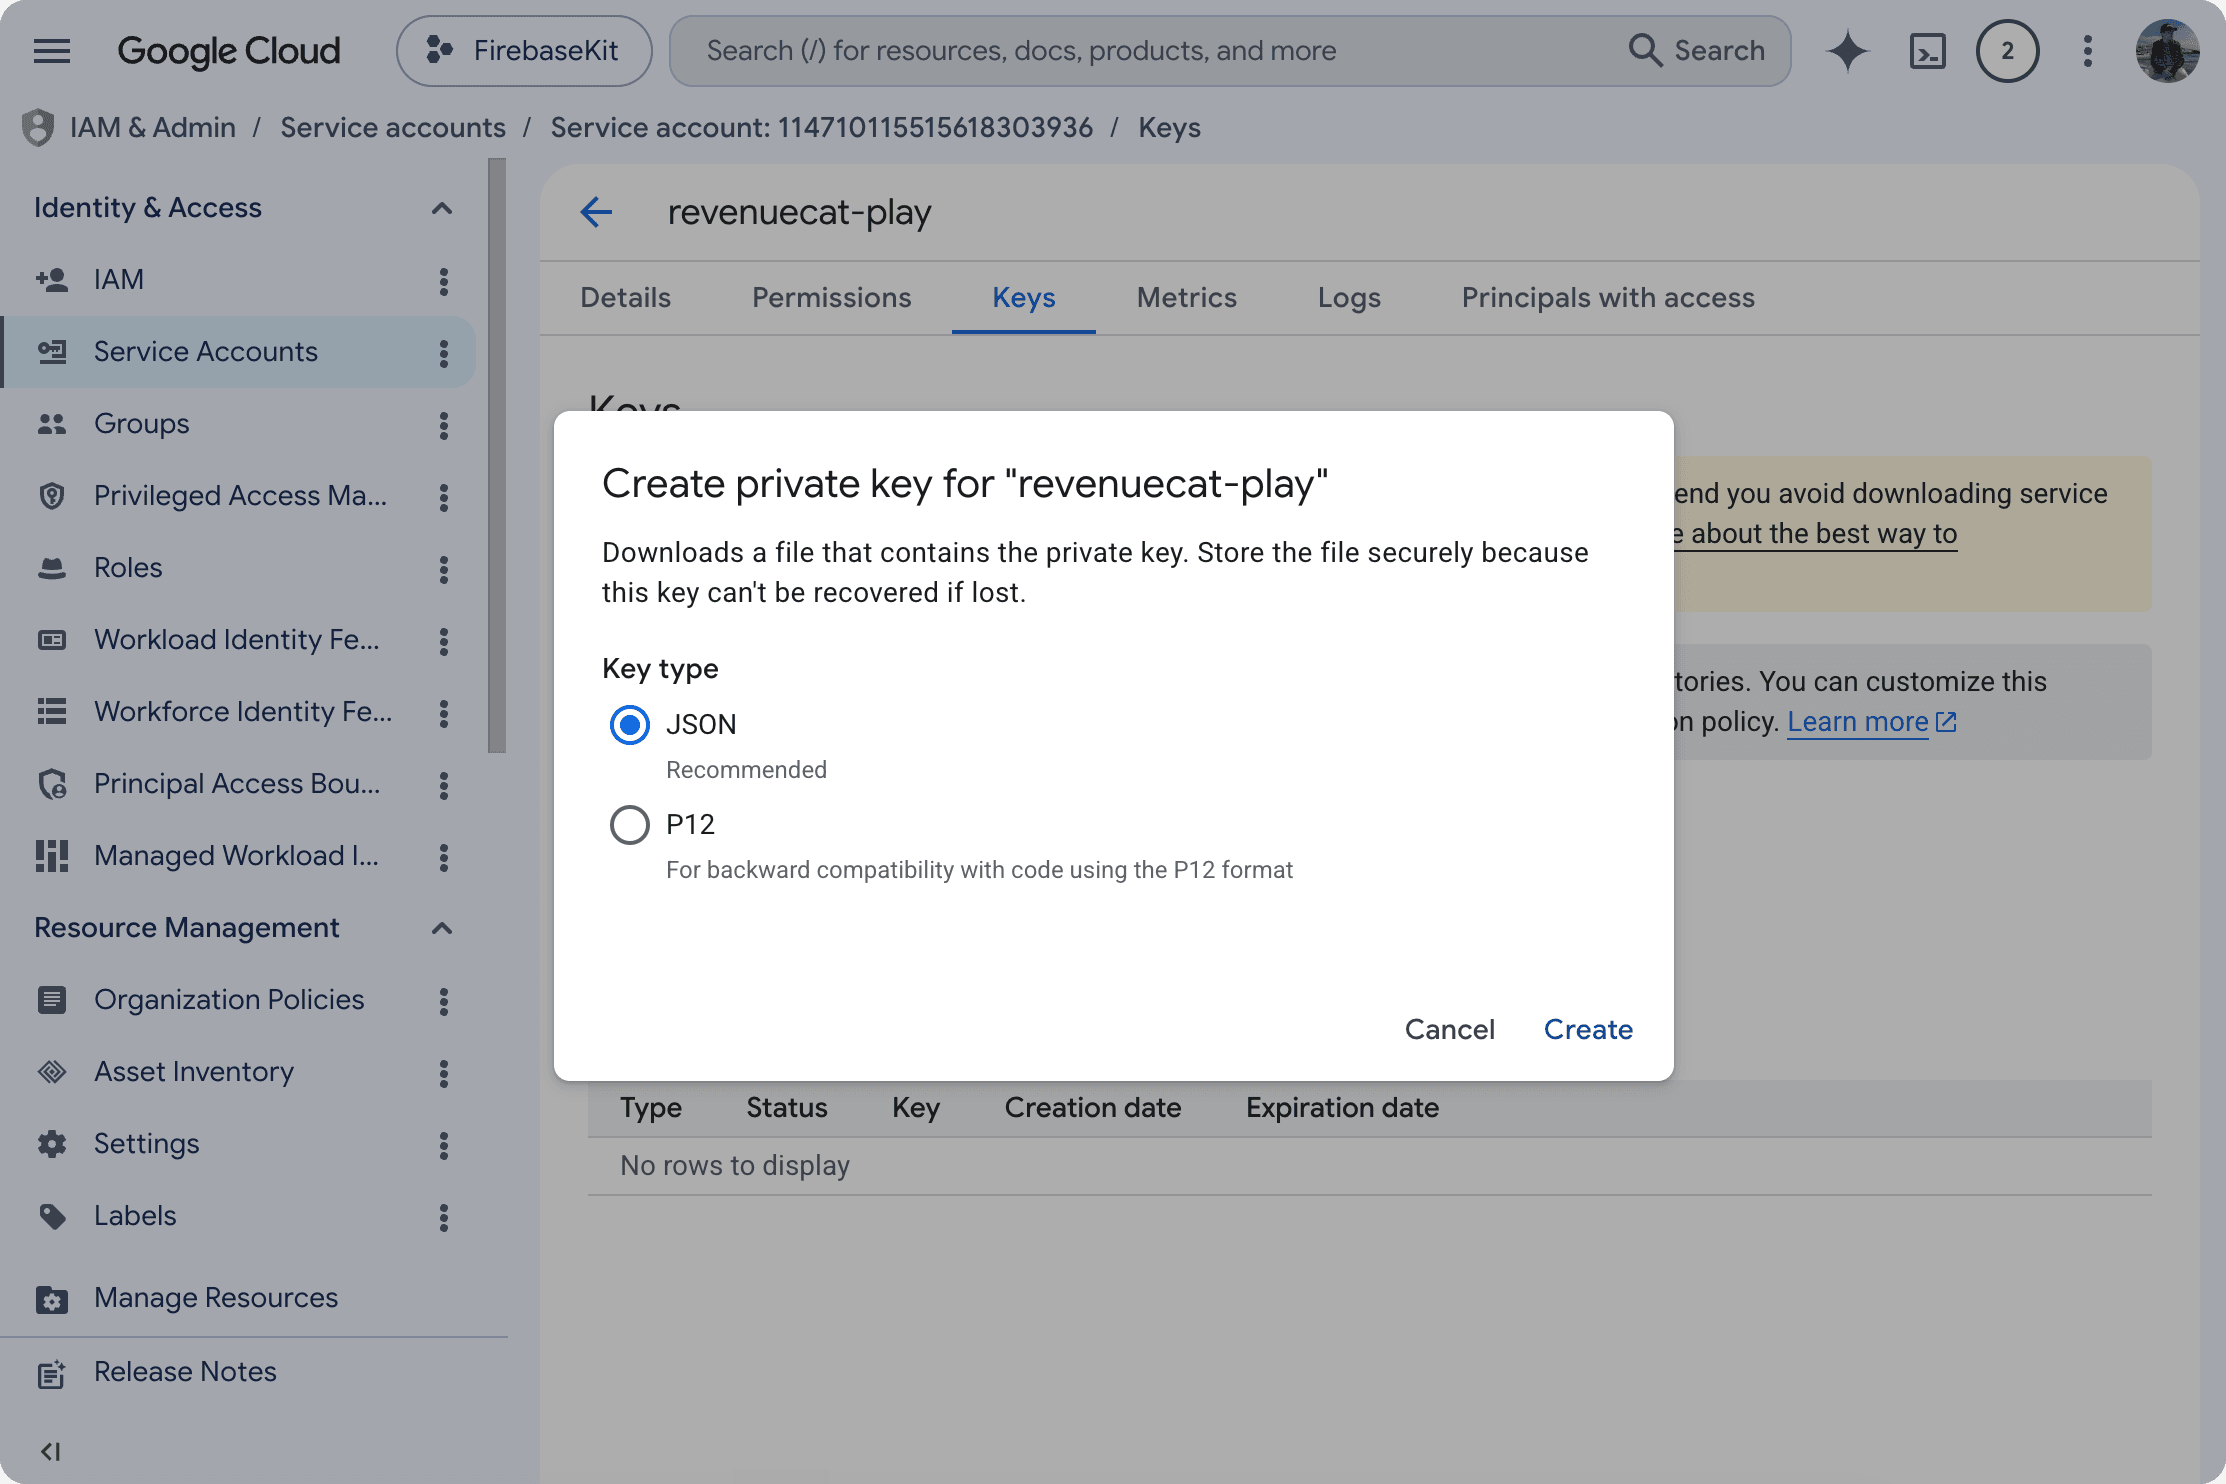
b) IAM & Admin → Service Accounts → + Create → give it a name (e.g. revenuecat-play) → Create and continue (no roles needed here). Then open the account you created → Keys tab → Add key → Create new key → JSON: the download starts automatically. Keep this file, you'll need it in step (d).
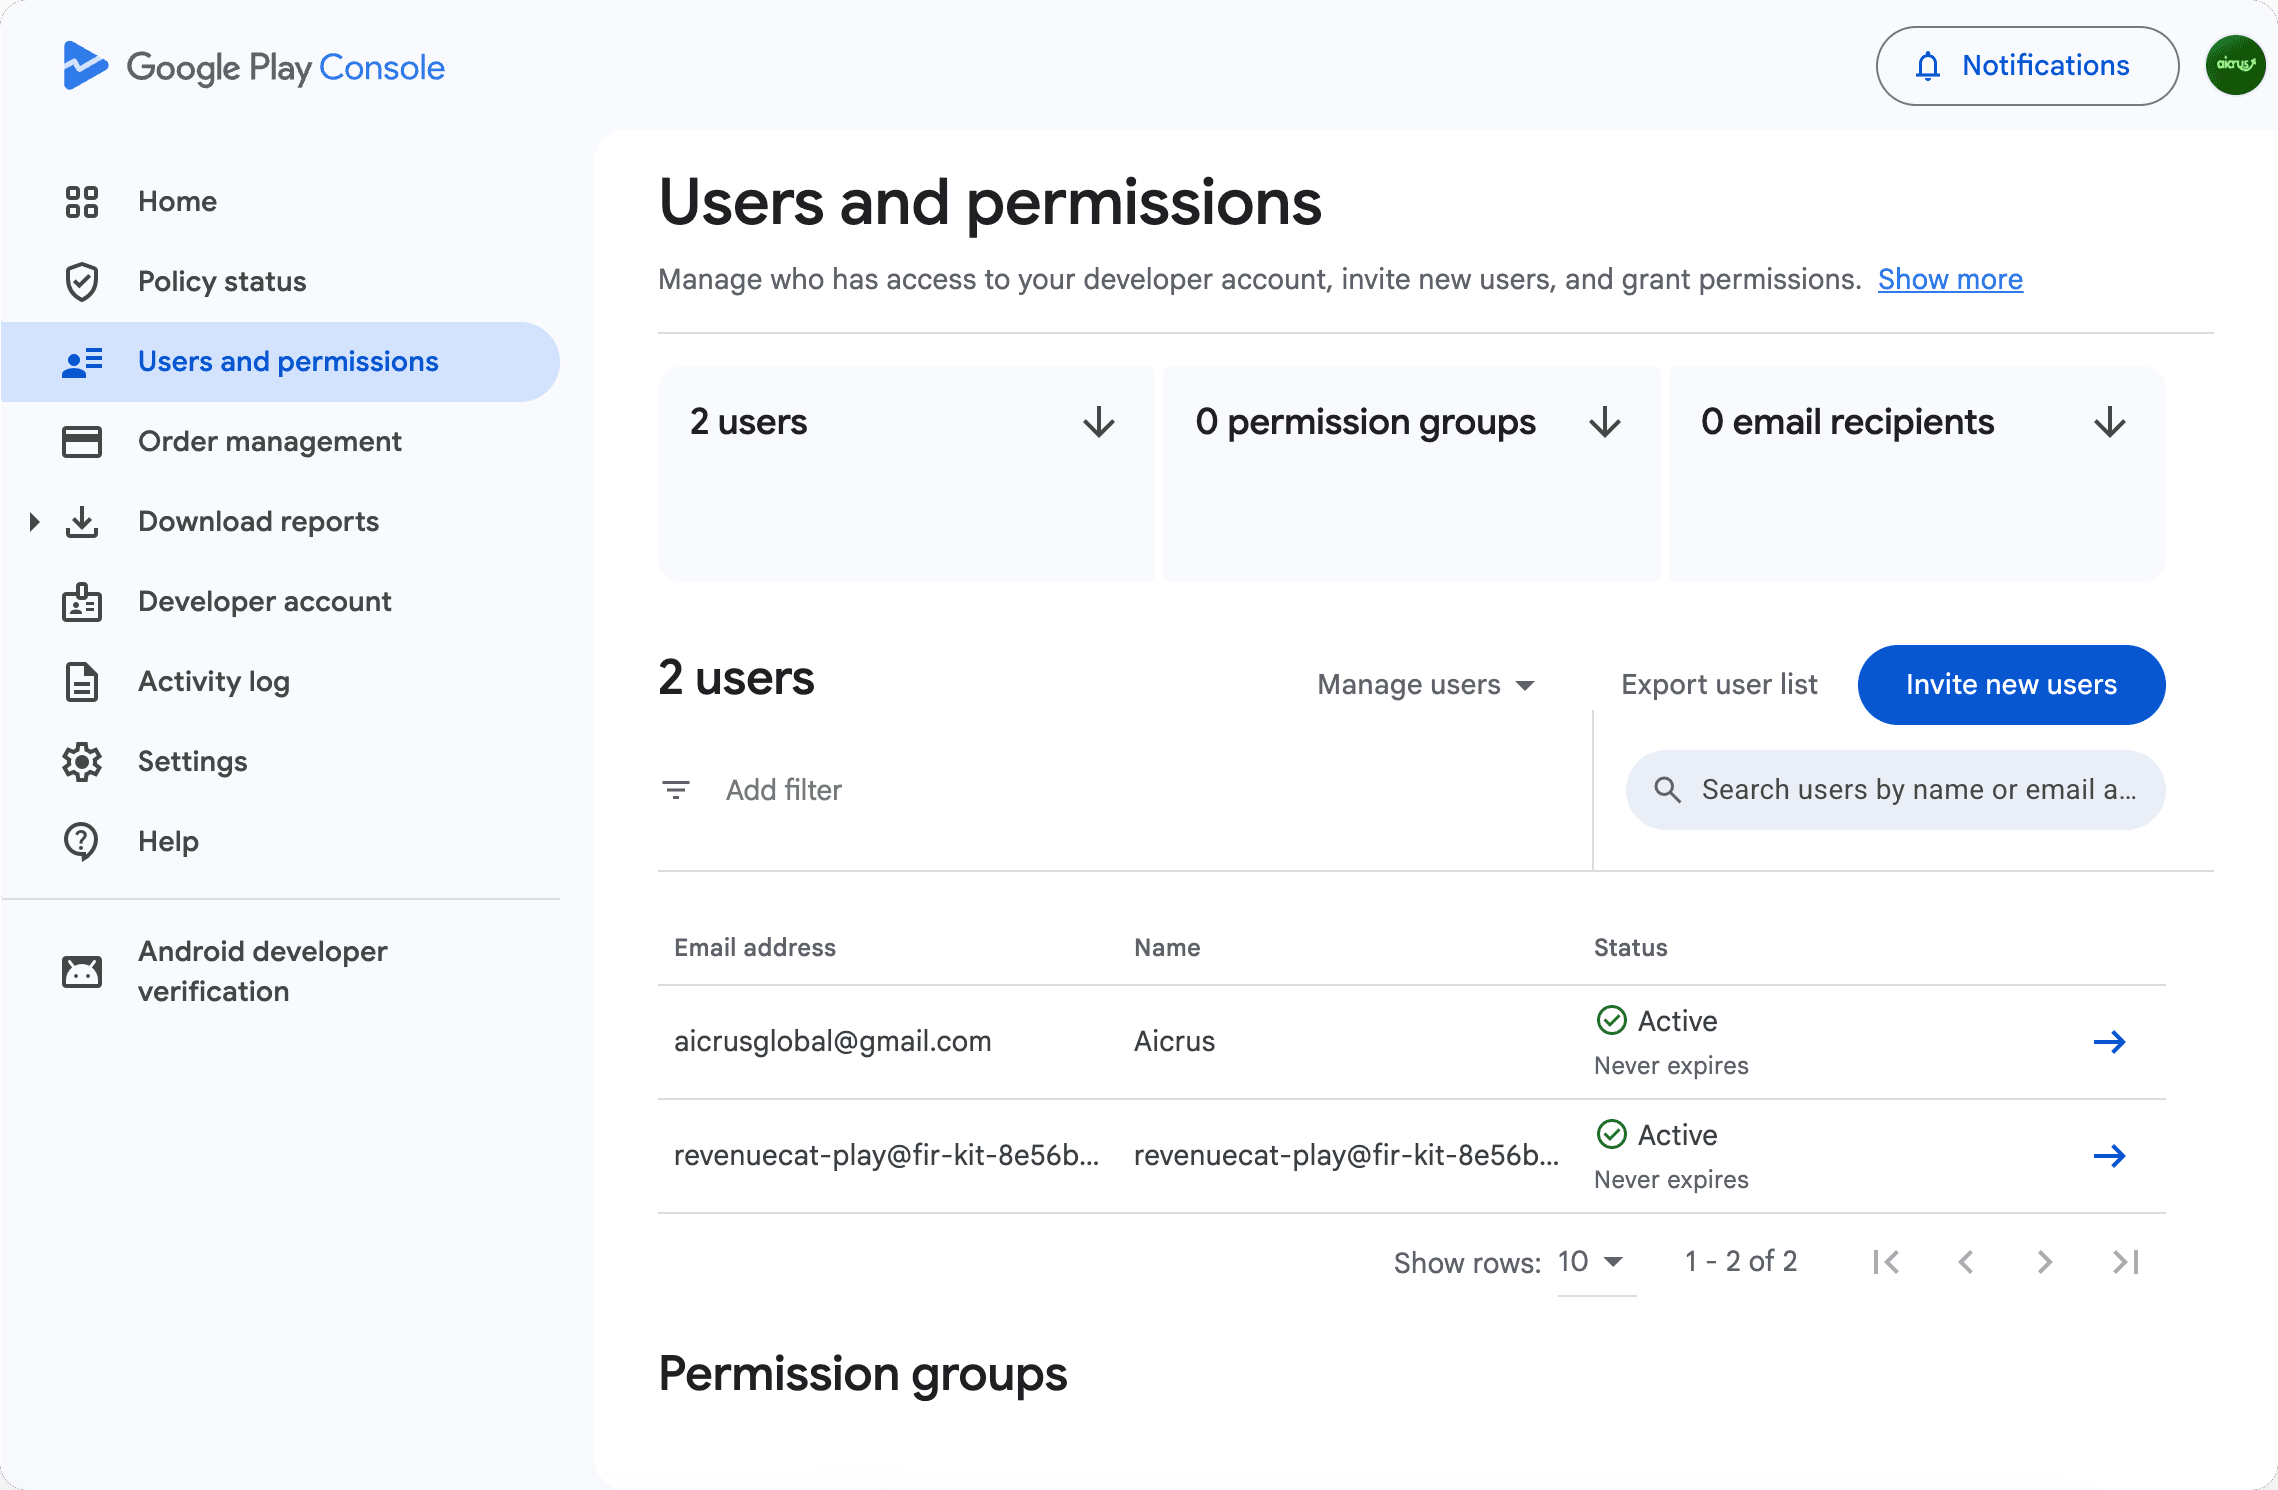
c) Google Play Console → Users and permissions → Invite new users → paste the service account's email (name@your-project.iam.gserviceaccount.com) → Admin permission → apply to the app
d) In the RC dashboard → Apps → + Add app → Google Play → upload the service account's JSON → copy the goog_xxx key
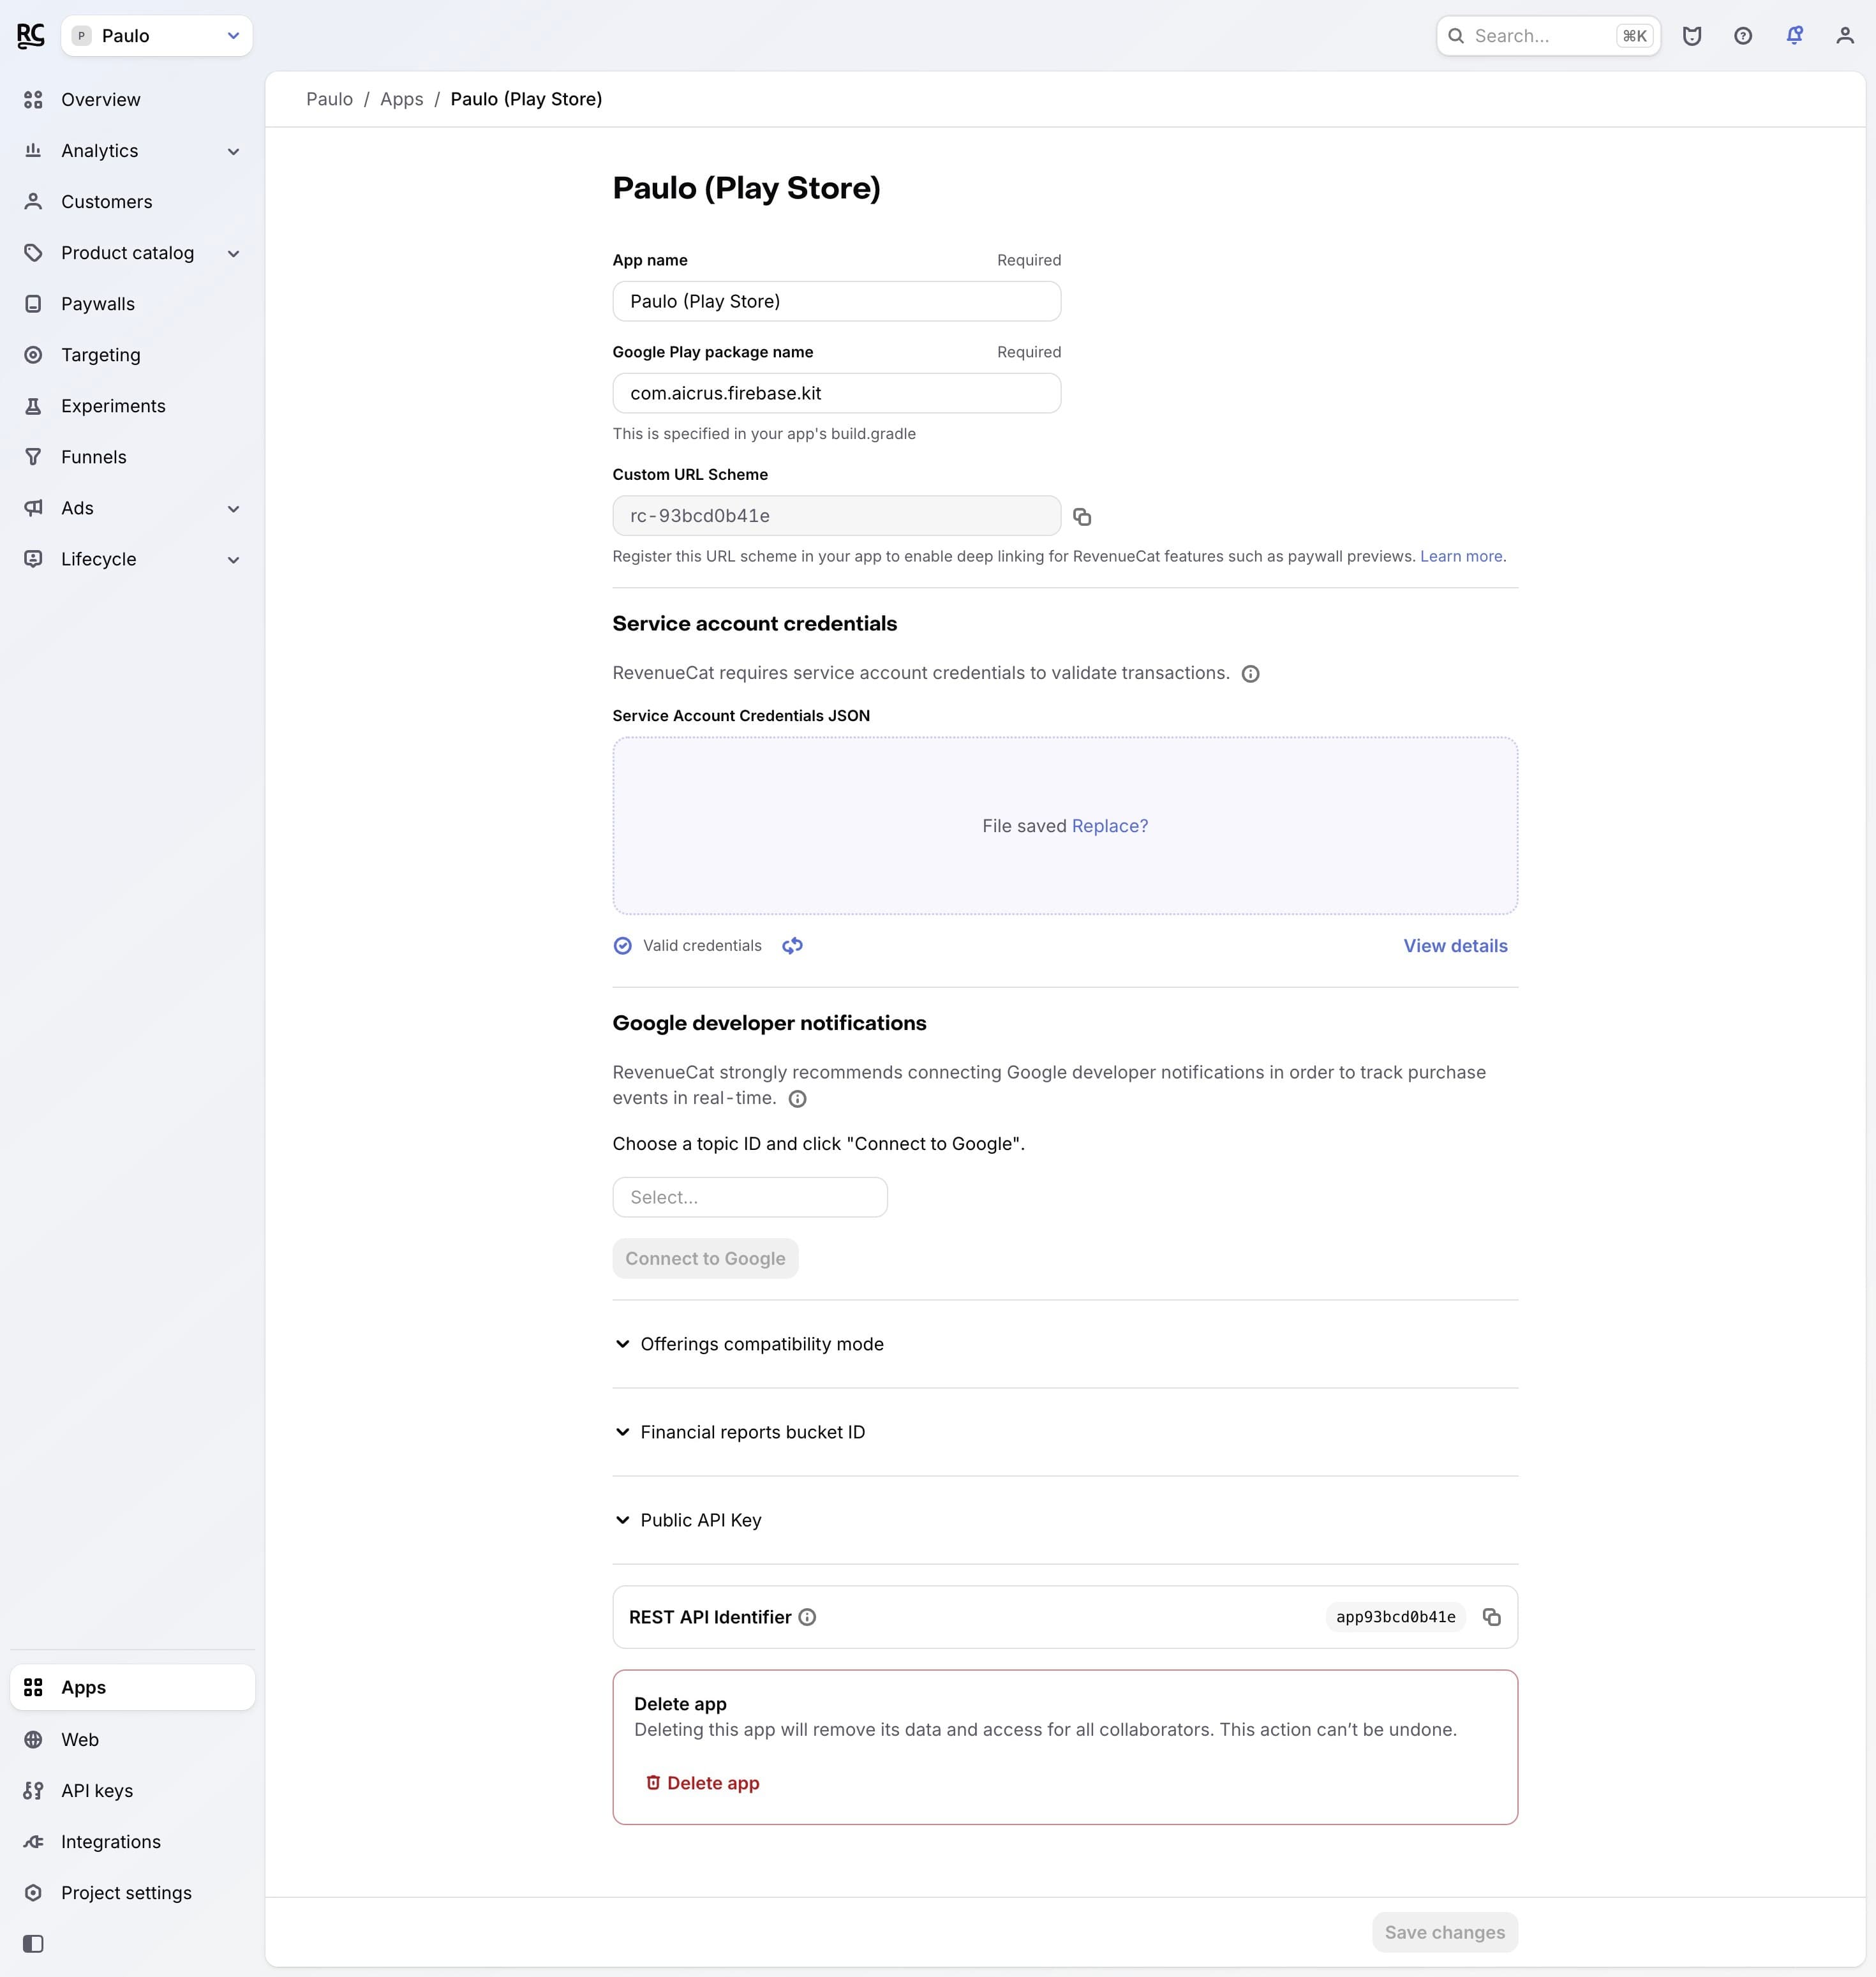
Paste it into the .env:
RC_ANDROID_PROD_KEY=goog_xxxxxxxxxxxxxxxPhase 3: Production
Use the same keys from Phase 2. RevenueCat detects on its own whether a purchase is Sandbox or Production. What changes:
- The P8 key is required in RC for iOS (App Settings → In-App Purchase Key)
- The products need to be approved in the stores
- Test via TestFlight before submitting (iOS)
Never leave test_ in a store build. The RevenueCat SDK deliberately crashes the app in release when it detects a test key. kasy run and kasy ios release automatically use the production keys from the .env.
Information
What the CLI configures automatically
When you select RevenueCat in kasy new or kasy add revenuecat:
| What the CLI does | What you do |
|---|---|
Installs purchases_flutter | Create an account on RevenueCat |
Asks for up to 3 keys and saves them in the .env | Paste at least the test key when the CLI asks |
| Generates the feature's code (paywall, repository, etc.) | Create Products, Entitlements, and Offerings in the RC dashboard |
| Firebase: deploys the webhook's Cloud Function | Register the webhook URL in the RC dashboard |
| Supabase: deploys the webhook's Edge Function | No extra action |
| REST API: you implement the webhook | Register the URL in the RC dashboard |
REST API: the app is the same across the 3 backends, but on REST API you implement RevenueCat's webhook handler on your own server. When RC fires the event, your server validates the Authorization header against the configured REVENUECAT_WEBHOOK_KEY and writes to subscriptions(user_id, store=REVENUECAT, ...). The full payload contract is in the README.md generated inside your Kasy project.
3 essential concepts
| Term | What it is | Example |
|---|---|---|
| Product | The sellable item in the store (Apple/Google) | Monthly subscription $19.90 |
| Entitlement | The permission the product unlocks in the app | premium_access |
| Offering | The set of products shown on the paywall | Monthly plan + annual |
Flow: Product purchased → Entitlement active → the app unlocks premium content
Keys by device type
RevenueCat uses three key types, each for a different environment:
| Key | Works on |
|---|---|
test_xxx | iOS simulator and Android emulator |
appl_xxx | Physical iPhone (Sandbox and Production) |
goog_xxx | Physical Android |
kasy run detects the device and injects the right key. In the .env:
RC_TEST_KEY=test_xxx
RC_IOS_PROD_KEY=appl_xxx
RC_ANDROID_PROD_KEY=goog_xxx
If only RC_TEST_KEY is filled in, kasy run uses it on any device and warns you. The development flow doesn't break.
Free trial period
The trial is detected automatically by the kit. When the product has an introductoryPrice with price = 0.0, the duration shows up on the paywall automatically. You don't change anything in the code, just configure it in the stores.
iOS: App Store Connect
- App Store Connect → your app → In-App Purchases
- Select the product
- Under "Subscription Prices" → + → Add Introductory Offer
- Type: Free Trial → set the duration (7 days, 1 month, etc.)
- Save
Android: Google Play Console
- Google Play Console → Monetize → Subscriptions
- Select the product → the "Free trial" section
- Set the duration in days → Save (may take a few hours to activate)
Subscription length in Sandbox
In Sandbox, subscriptions last minutes. That's normal:
| Plan | iOS Sandbox | Android Sandbox |
|---|---|---|
| Monthly | 5 min | 5 min |
| Annual | 1 hour | 30 min |
Each subscription auto-renews up to 6 times before expiring. If the subscription "disappeared" during testing, it's not a bug.
Choosing and switching the paywall
The kit ships with 4 ready-made paywalls. In kasy new Quick mode the default is unlock; in Step-by-step mode the CLI asks which one to use. All 4 files go into the project either way, switching later is a one-line edit.
PaywallFactory.X | Best for |
|---|---|
solo | A single plan. Benefits + subscribe button, no distractions |
compare | Plans side by side + a free vs premium comparison table |
trial | Annual plan with a free-trial toggle and a video backdrop |
unlock | Onboarding conversion or a "hard" paywall (Quick mode default) |
To switch it, edit your project's router.dart:
// before:
child: const PremiumPage(paywall: PaywallFactory.unlock),
// after:
child: const PremiumPage(paywall: PaywallFactory.solo),
How trial works
The toggle turns the annual plan's free trial on and off: ON shows "X days free, then the price"; OFF subscribes to the annual plan charging right away. It's the pattern used by Duolingo, Calm, and Headspace: the trial removes the barrier of the pricier plan. If the trial isn't configured in the stores yet, it shows "0 days free" (expected during development). If no product has a trial, prefer solo or compare.
Preview all 4 before choosing
Admin Console → Tools → Paywalls shows the 4 layouts in preview mode, with no real purchase. Check them in light and dark mode before deciding.
A/B testing prices and offers (RevenueCat Experiments, all backends)
The RC dashboard's Experiments section serves different Offerings to groups of users (e.g., a 7 vs 14-day trial, full price vs discount). The kit's code already uses getOfferings().current, so the experiment works without changing anything in the app.
Does changing the name, price, or product need a new version?
No. The paywall fetches everything from the stores and the RC dashboard at runtime:
| What you change | Where it changes | New version? |
|---|---|---|
| Product name | App Store Connect / Play Console | No |
| Price | App Store Connect / Play Console | No |
| Which products show up (Offering) | RevenueCat dashboard | No |
| Trial (free days) | App Store Connect / Play Console | No |
The user sees the change on the next app open (SDK cache). During development, use hot restart (R): hot reload (r) doesn't refetch RC's data.
Common errors
INVALID_CREDENTIALS
| Cause | Fix |
|---|---|
test_ key with an App Store type app in RC | Change the type to Test Store |
| Key typed incorrectly | Copy it again from the dashboard, no spaces |
appl_ key with a Test Store type app | Create an App Store type app in RC |
Products don't show up on the paywall
- Identical IDs in App Store Connect/Play Console and RC, character for character
- (iOS) Paid Applications Agreement signed and bank account validated; without this, nothing shows up, not even in Sandbox
- (iOS) Product in
Ready to SubmitorApproved - (Android) App published to the internal track and an active payments account
- Test on a physical device: the simulator only works with Test Store
Sandbox returns an empty list even with the right key
It's almost always incomplete business setup: (iOS) Agreements, Tax, and Banking pending; (Android) unverified payments account. These steps block Sandbox regardless of RevenueCat.
Costs
| Service | Cost |
|---|---|
| RevenueCat | Free up to USD $2,500/month in revenue |
| Apple Developer Program | USD $99/year |
| Google Play Developer Program | USD $25 (one-time) |
MCP for RevenueCat
RevenueCat has an MCP server that lets you create Products, Entitlements, Offerings, and paywalls straight from Claude, without opening the dashboard.
Setup
RevenueCat dashboard → top-right menu (your name) → API Keys → Secret API keys → + New secret API key (starts with sk_).
Paste this into your AI (swap in your own key):
Set up the RevenueCat MCP on this machine, in Claude Code.
It's a remote HTTP-type MCP server at the URL https://mcp.revenuecat.ai/mcp
with the header:  Authorization: Bearer MY_KEY
My secret key is: sk_XXXXXXXX
Add it as an MCP server called "revenuecat".
At the end, tell me to restart Claude Code.
Restart Claude Code. The MCP only loads in a new session.
If you'd rather configure it by hand, add it to Claude's MCP config file (~/.claude.json or equivalent):
{
  "mcpServers": {
    "revenuecat": {
      "type": "http",
      "url": "https://mcp.revenuecat.ai/mcp",
      "headers": {
        "Authorization": "Bearer YOUR_SK_HERE"
      }
    }
  }
}
What you can do with it
- "Create a
premium_monthlyproduct in project X" - "Create a
defaultOffering and attach products A and B" - "List every Entitlement in my project"
- "Show me last month's revenue metrics"
Last updated on 08/23/2026